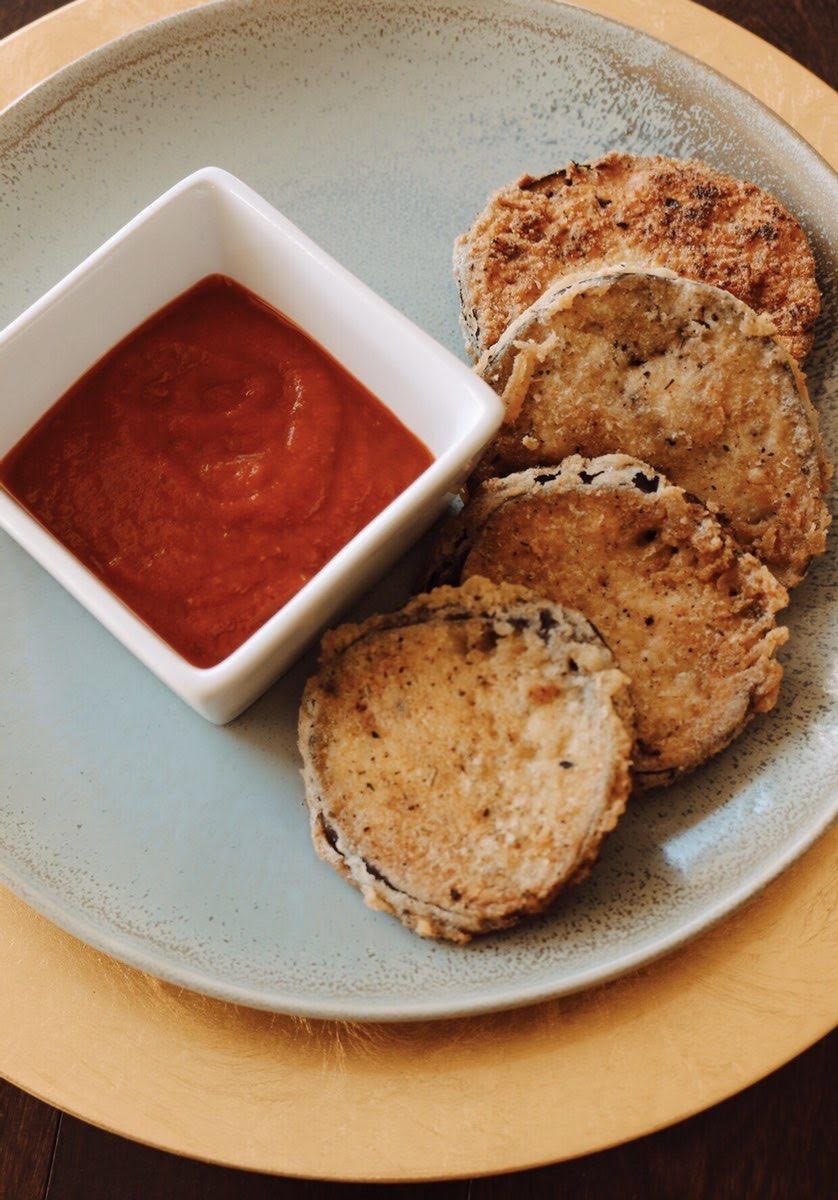
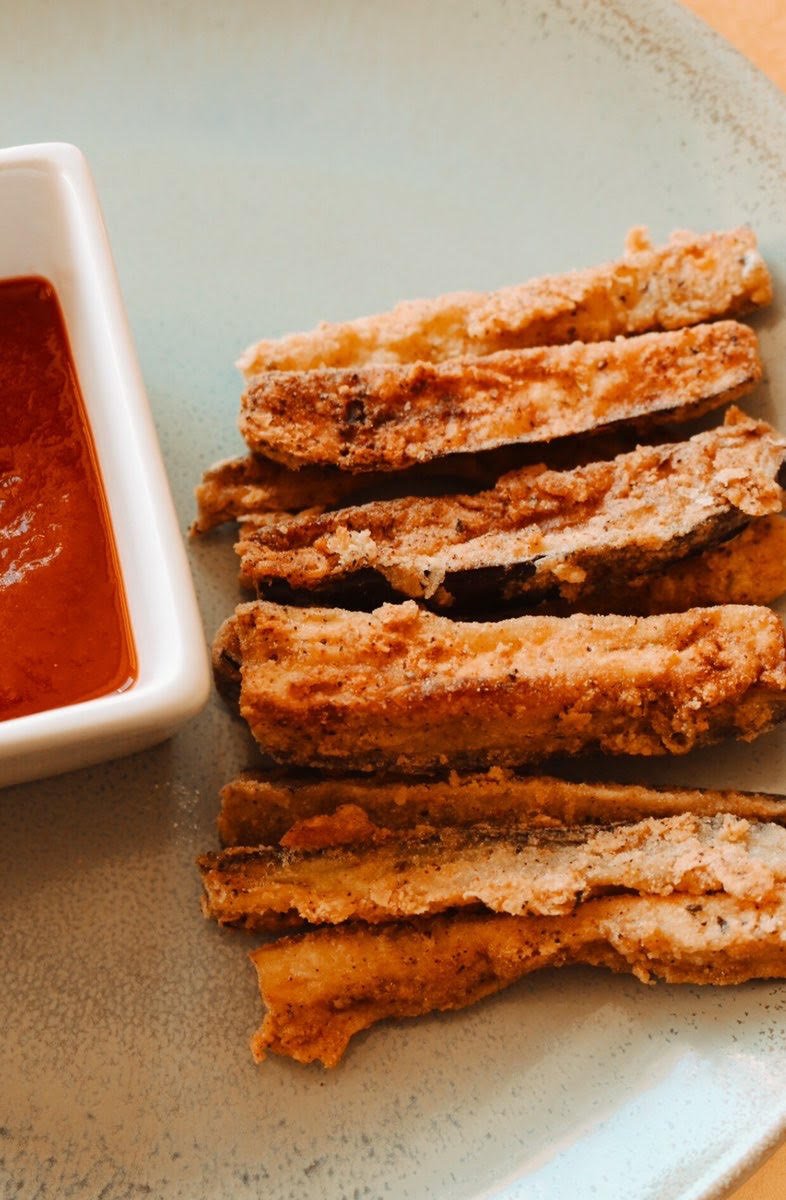
Whole30 Fried Eggplant with Marinara

I can’t say I like eggplant , but I LOVE these! The combination of the savory breading and tender eggplant has allowed me to successfully trick my kids into thinking they’re eating mozzarella sticks . I like dipping them in classic marinara sauce (I buy mine from Aldi), but free to use whatever sauce you love, or make your own.


Ingredients:

  • 1 eggplant (sweated, rinsed, and cut into fries or rounds)

  • 2 eggs, whisked

  • 1 cup cassava flour

  • 2 tsp. sea salt (plus more for preparing eggplant)

  • 1 tsp. pepper

  • 1 tsp. garlic powder

  • 1 tsp. onion powder

  • 1 tsp. Italian seasoning

  • 1/2 tsp. paprika

  • Avocado oil for frying

  • Whole30-compatible marinara for dipping


Directions:

  1. Cut off the stem of the eggplant and cut into fries or rounds (fries are more time-consuming, but really worth it).

  2. Place eggplant in a strainer in the sink, and sprinkle with salt. Allow the eggplant to “sweat” for 10 minutes, to remove the moisture (and keep your fried eggplant from being soggy).

  3. Thoroughly rinse the eggplant to remove all the salt, then spread out on a kitchen towel or paper towel to dry.

  4. Preheat a cast iron skillet over medium heat and add enough avocado oil to cover the bottom.

  5. Combine the cassava flour and all spices in a bowl to make the breading.

  6. Whisk the 2 eggs in a second bowl to make the egg wash.

  7. Once your skillet is preheated and your eggplant are dry, begin breading the eggplant in batches.

  8. One at a time, dip an eggplant fry or round in the flour mixture, so that it is lightly coated on both sides.

  9. Shake off any excess flour, and then dip the eggplant in the egg wash, coating it on both sides.

  10. Allow any excess egg wash to drip off, and then put the eggplant back in the flour mixture, being sure to coat it well.  (This double flour method is crucial for making a nice, crispy breading.)

  11. Place the breaded eggplant in the skillet, and fry on all sides, until a golden-brown crust forms. Rounds will cook longer, and need to be flipped once, whereas fries will take less time to crisp up, but will need to be turned to bread all four sides.

  12. Place cooked eggplant on a paper towel-lined cooking rack, and serve warm with marinara for dipping.

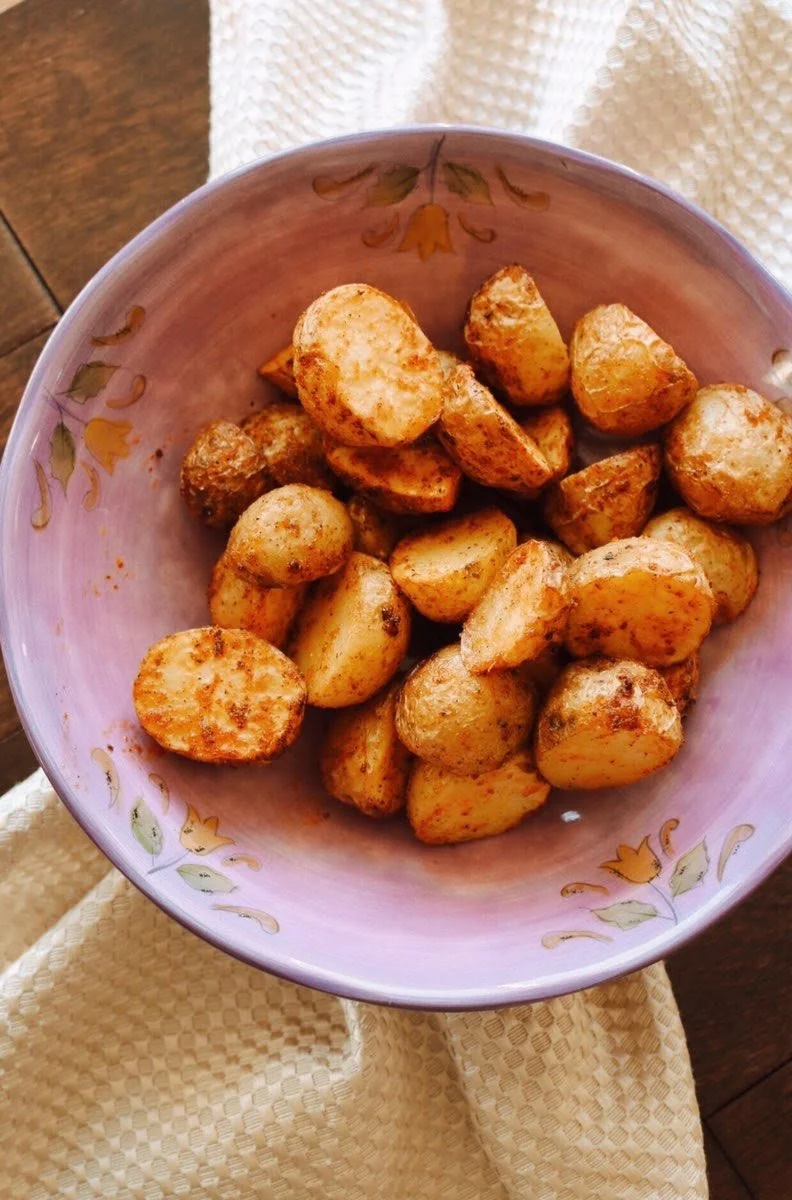
Air Fryer Baby Potatoes - GF/DF/Whole30

When my oven broke a few weeks ago I found myself adapting all of my roasted veggies recipes to my air fryer. These baby potatoes are cut in half (or fourths, depending on the size), seasoned with my favorite all-purpose seasoning, and made crispy in the air fryer. I’ve included the recipes for both the seasoning blend, as well as the potatoes. Don’t have an air fryer? Simply bake these on a parchment paper-lined baking sheet for 25-30 minutes at 400°F, tossing halfway.

To make the all-purpose seasoning, add equal parts of sea salt, garlic powder, onion powder, and paprika, and HALF as much pepper to a mason jar or an old seasoning container. So, for example, I may add 2 tbsp. salt, 2 tbsp. garlic powder, 2 tbsp. onion powder, 2 tbsp. paprika, and 1 tbsp. black pepper to a jar. Secure container with a lid, and then shake, baby, shake! You won’t use all of this for this recipe, so save the seasoning for next time or to add to any of your Whole30 veggies and meats.


Ingredients:

  • 1.5 pounds baby potatoes

  • 1 tbsp. Avocado oil

  • 1-2 tsp. all-purpose seasoning


Directions:

  1. Wash baby potatoes, then cut into halves or fourths, depending on size.

  2. Add potatoes, avocado oil, and seasoning to a large bowl, and stir well to distribute seasoning. (I don’t even dirty a bowl and do this right in the main compartment of my air fryer.)
  3. Cook potatoes at 400°F for 20 minutes, stirring after 10 and 15 minutes to make sure all potatoes are cooked.

  4. Serve warm with Whole30 ketchup or my homemade ranch.


Paleo Caramel Sauce - GF/DF

I’m not here to debate the proper pronunciation of caramel, and instead want to share this quick and easy recipe for Paleo caramel sauce. Whether you’re looking for a healthier dip for apple slices, or something to drizzle over your favorite dairy-free ice cream or brownies, this recipe is a must-try!


Ingredients:

  • 1, 15oz. can full fat coconut milk

  • 2/3 cup coconut sugar

  • 2/4 cup maple syrup 

  • 3 tbsp. coconut oil

  • 1.5 tsp. vanilla extract 

  • 1/4 tsp. sea salt 

  • arrowroot powder as needed (~ 1 tsp)


Directions:

  1. Add coconut milk, coconut sugar, maple syrup, vanilla, and coconut oil in a medium saucepan, and bring to a boil, stirring often.

  2. Reduce heat and simmer for ~ 12 minutes, stirring often, until caramel sauce has thickened.

  3. Add sea salt and stir.

  4. Add arrowroot powder 1/4 tsp. at a time until caramel sauce has thickened a little. It will thicken more as it cools and as you refrigerate it.

  5. Remove the caramel sauce from the heat and allow it to cool completely. Then store it in the fridge until ready to serve.


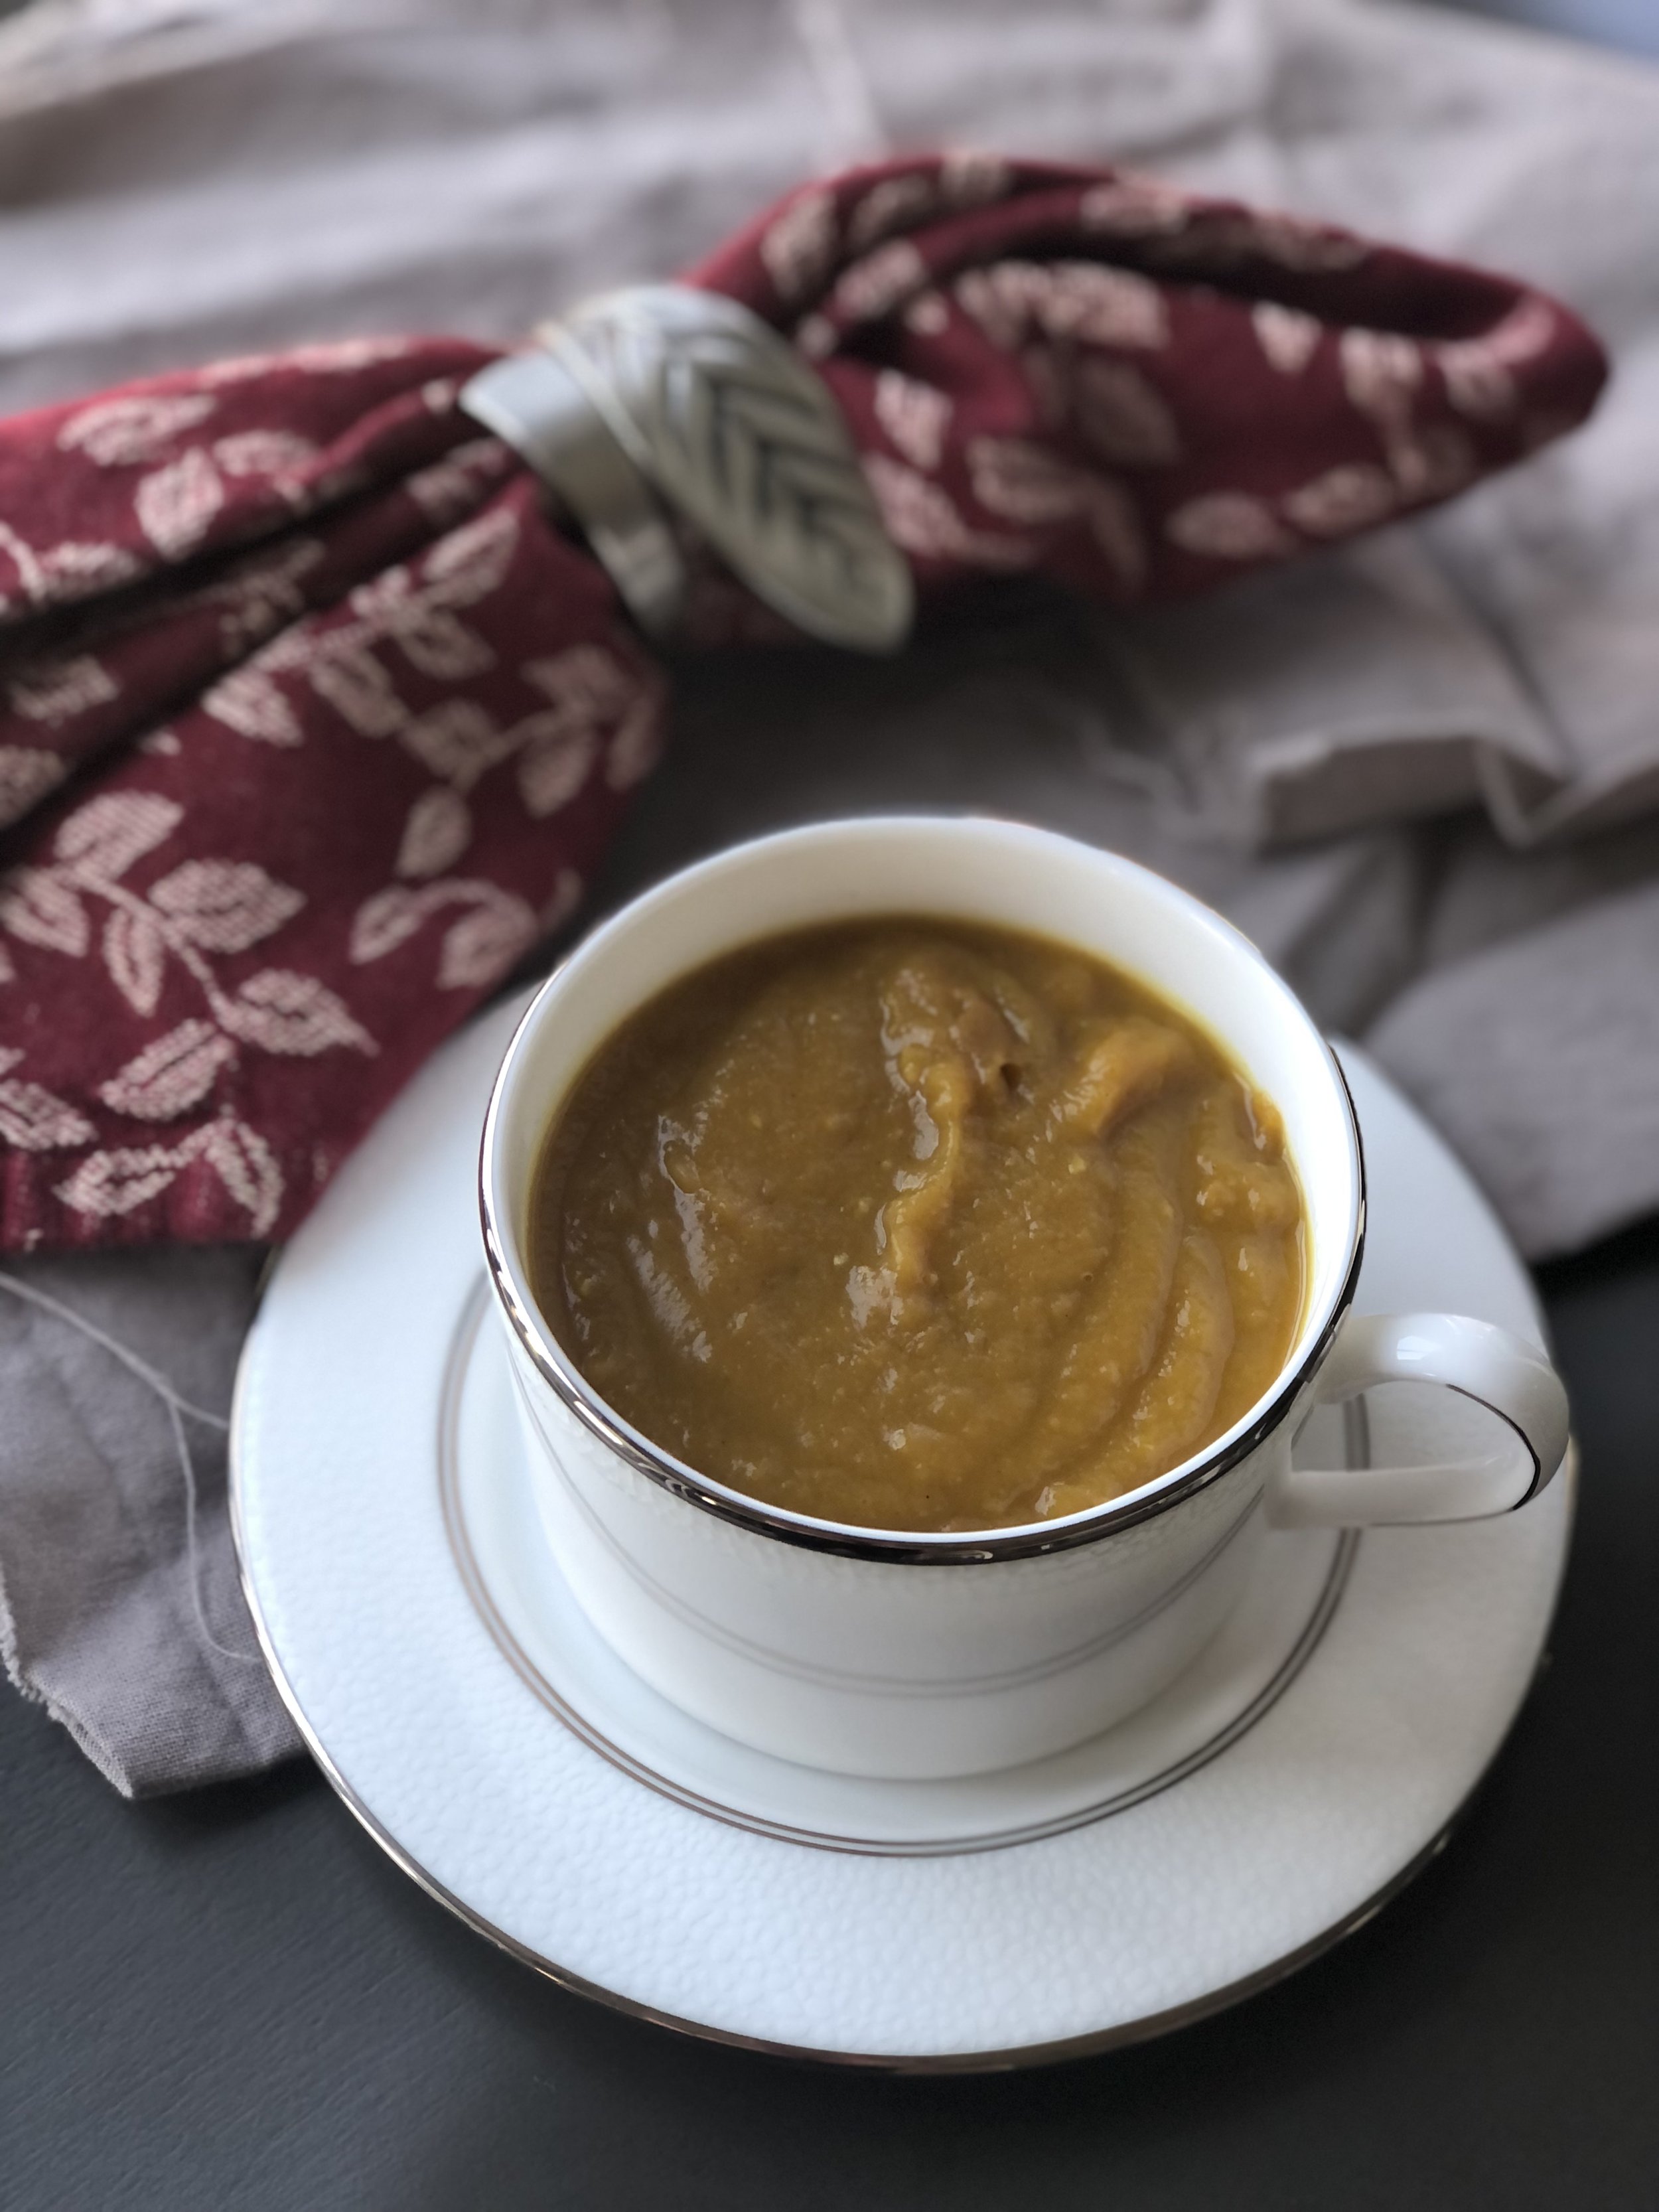
AIP Instant Pot Butternut Squash Soup - Whole30/GF/DF/Vegan/AIP

I have been making Detoxinista’s Instant Pot Butternut Squash Soup for years. Everyone in my family (including my four kids) love it! However, when I had a catering client hire me to cook for a large group of her patients on the Autoimmune Protocol, I played around with Megan’s original recipe, and developed my own AIP-friendly version. With just a few simple steps and ingredients, this Whole30, vegan, and AIP-friendly soup recipe can be made in minutes and really wow a crowd.


Ingredients:

  • 3, 10oz. bags frozen butternut squash (Try Aldi organic frozen squash!)

  • Avocado oil

  • 1 small onion, diced 

  • 1.5 tsp. minced garlic 

  • 3/4 tsp. garlic powder 

  • 3/4 tsp. onion powder 

  • 3/4 tsp. turmeric 

  • 1/2 tsp. cinnamon 

  • 1/4 tsp. ground ginger 

  • 1/8 tsp. ground cloves 

  • 1.5 tsp. sea salt 

  • 3 cups water 

  • 1/2 cup canned full-fat coconut milk 


Directions:

  1. Press the “sauté” button on your Instant Pot and add avocado oil.

  2. While you wait for it to heat, add all spices EXCEPT sea salt to a small bowl and set aside.

  3. Sauté the onion in avocado oil for a few minutes, until tender .

  4. Add the minced garlic and all spices EXCEPT sea salt to the Instant Pot, and stir until fragrant.

  5. Cancel your Instant Pot, then pour in the water, butternut squash, and salt, and stir well.

  6. Secure the lid, make sure the venting valve is set to “sealing”, and press the “soup button” on your Instant Pot.

  7. Allow the Instant Pot to do its thing, and wait at least 10 minutes after the cooking cycle is complete for the pressure to release naturally. After 10 minutes you can leave it to finish naturally release pressure, or cancel and quick release the rest of the pressure.

  8. Once it is safe to open your Instant Pot, place an immersion blender in the bottom of the pot and blend until smooth. If you don’t have an immersion blender you can transfer the soup to a regular blender, but be careful, because the liquid will be very hot!

  9. Once the soup is blended and smooth, stir in the coconut milk.


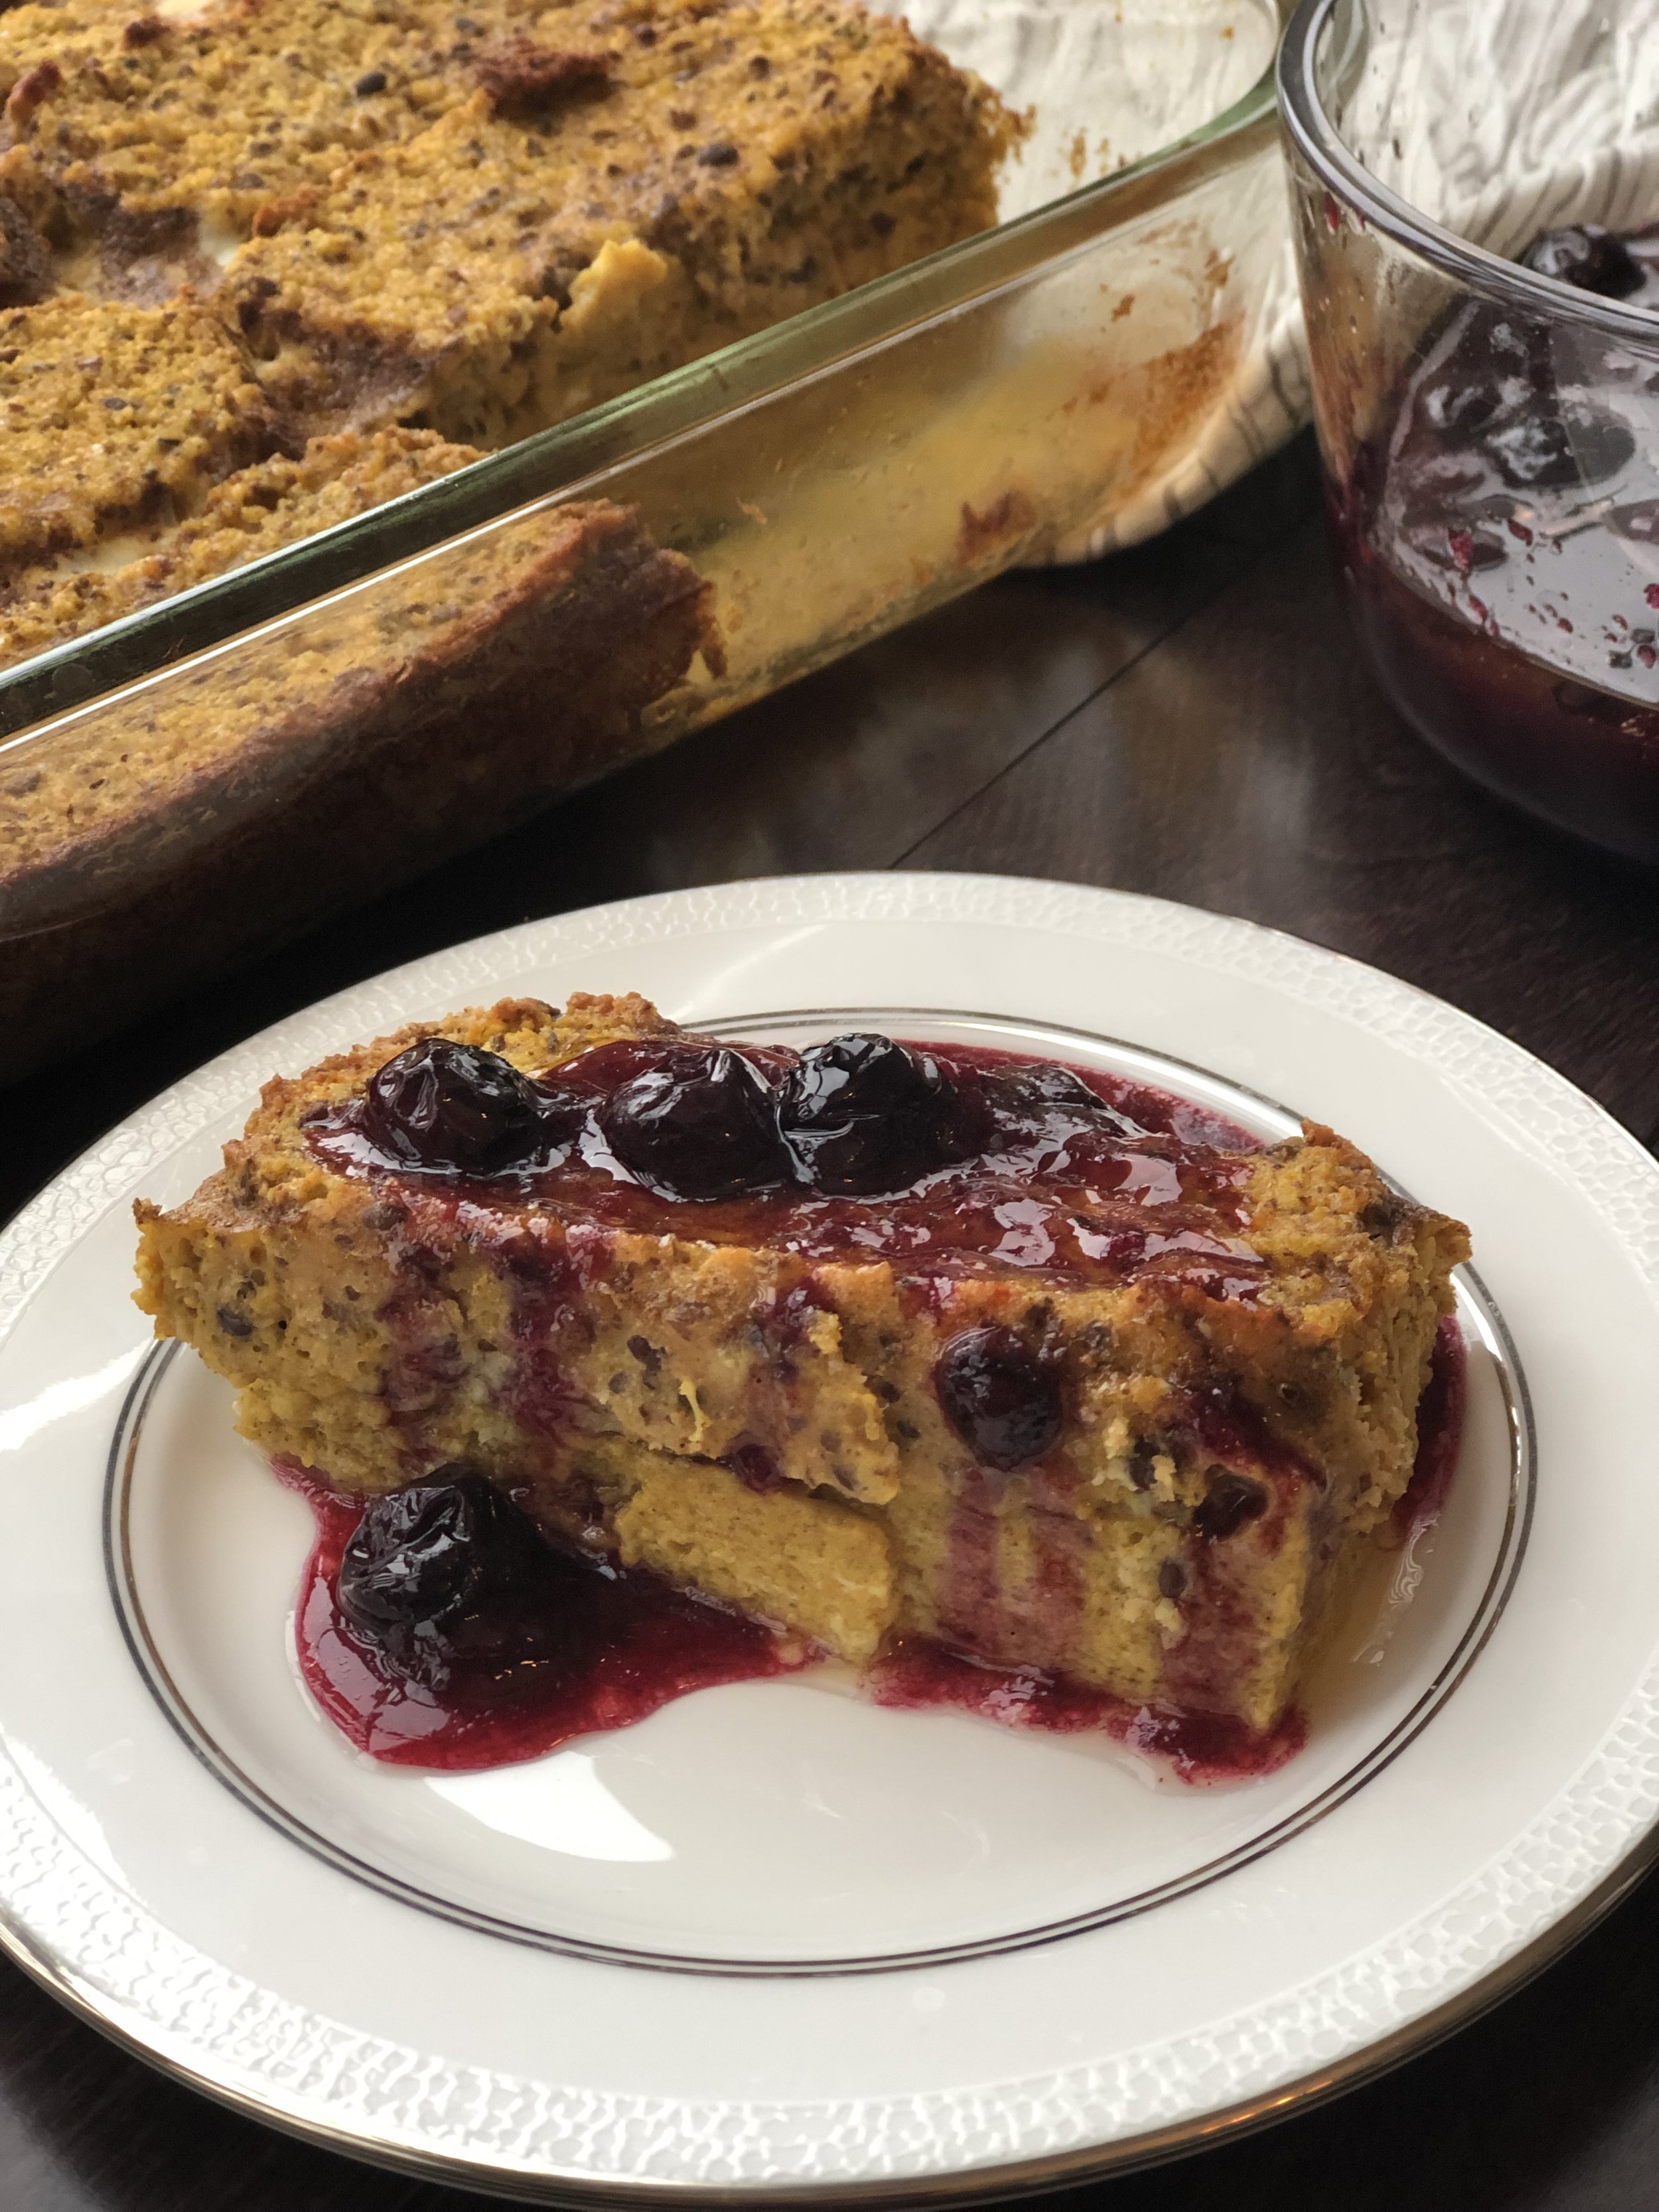
Paleo Pumpkin French Toast with Blueberry Compote - GF/DF/Paleo

If you want something delicious to wake up to on Christmas morning, look no further! Prep everything the night before, pop it in the oven in the morning, and breakfast is ready! I make this using my Paleo Blender Bread, but you can substitute the bread for your favorite store-bought bread or homemade sourdough loaf.


Ingredients:

- 1 loaf Paleo bread, or your favorite store-bought bread
- 8 eggs
- 1 can pumpkin purée
- 1 cup almond milk
- 2/3 cup maple syrup
- 2 tsp. vanilla
- 1.5 tsp. cinnamon
- 1/4 tsp. salt
Compote:
- 2 tbsp. ghee
- 1 cup blueberries
- 1 tsp. arrowroot powder
- 1 tsp. lemon juice
- 1/2 tsp. cinnamon
- pinch salt
- 2 tbsp. maple syrup


Directions:

The night before:
1. Grease a 9x13 baking dish and arrange bread slices on the bottom.
2. In a large bowl, whisk together eggs, pumpkin purée, almond milk, maple syrup, vanilla, cinnamon, and salt.
3. Pour mixture over the bread and flip each slice so that they get well-coated.
4. Cover and refrigerate overnight.

In the morning:
1. Preheat oven to 375F.
2. Remove cover and bake French toast for 30-35 minutes.
3. Meanwhile, make the compote.***
4. Add ghee to a saucepan and melt.
5. Toss berries with arrowroot powder in a small bowl and then add to the saucepan.
6. Add lemon juice, cinnamon, salt, and maple syrup, and stir.
7. Cover and cook on low, stirring regularly, for about 10 minutes, until it’s a thick sauce.
8. Serve warm over French toast.
*** you can make the compote ahead of time, refrigerate, and reheat, if desired.


Marinated Kale Salad - GF/DF/Vegan/Whole30

This is my go-to salad for potlucks and dinner parties, because I can make it a day or two in advance. In fact, the flavors get better over time, which is incentive to assemble it ahead of time. Leftovers last a week in an airtight container in the fridge, making this the perfect recipe for meal prep. This salad also doubles well and doesn’t need precise measurements for anything besides the vinaigrette ingredients. Enjoy!


Ingredients:

  • 1/2 cup EVOO

  • 1/4 cup lemon juice

  • 1/2 tsp. garlic powder

  • 1/2 tsp. onion powder

  • 1/2 tsp. sea salt

  • 1/4 tsp. pepper

  • 6 cups chopped kale, stems removed

  • 1 green bell pepper, diced

  • 1 seedless cucumber, diced

  • 1 cup cherry tomatoes, halved

  • 1/4 cup dried cranberries (watch for sneaky sugar if doing the Whole30)

  • 1/4 cup dried apricots, sliced

  • 1/4 cup pine nuts


Directions:

  1. Add EVOO, lemon juice, garlic powder, onion powder, salt, and pepper into a large mixing bowl, and whisk together to make a lemon vinaigrette.

  2. Add chopped kale to the mixing bowl and massage the dressing into the kale with your hands.

  3. Place the bowl in the fridge to marinate while you prep the veggies.

  4. After dicing the cucumber and green pepper, and halving the tomates, add them to the bowl and stir.

  5. Add dried cranberries, apricot slices, and pine nuts, and stir well.

  6. Store the salad in the fridge for at least 8 hours before serving (a full day or two is even better).

  7. When ready to serve, toss the salad well and top with a few extra pine nuts, cranberries, and apricots.

Whole30 Shakshuka

Can we all admit that it’s so fun to say the word “shakshuka”? You know what’s just as fun? Eating it! In this recipe you can take a smart-cut by using a jar of Whole30-compatible pasta sauce, instead of making the sauce from scratch. You can also just use a can of diced tomatoes and then season it more heavily. Like a frittata, it’s hard to mess up shakshuka. Either that, or I’m just so hungry in the morning I am not too picky.

 
Whatever it is, the way you tell your story online can make all the difference.
 

Ingredients:

  • EVOO

  • 1 small yellow onion, diced

  • 1 red pepper, diced

  • 1 tsp minced garlic

  • 1 jar Whole30-compatible pasta sauce

  • 6-10 eggs (however many you can squeeze in your skillet)

  • Salt to taste

  • Pepper to taste

  • Paprika to taste

  • Cumin to taste

  • Parsley to taste


Directions:

  1. Warm a cast iron skillet on medium heat.

  2. Add a tsp. or two of EVOO to the skillet and warm.

  3. Saute the diced onion until tender, about 3 minutes.

  4. Add the red pepper and saute, about 3 minutes.

  5. Add the minced garlic and saute until fragrant, about 1-2 minutes.

  6. Pour in the jar of pasta sauce and bring to a boil.

  7. Reduce heat to low and simmer the sauce until thickened.

  8. Meanwhile preheat the oven to 350F.

  9. Once the sauce is thickened and the oven is ready, make indentations in the sauce and crack an egg into each “well”.

  10. Sprinkle each egg with salt, pepper, paprika, cumin, and parsley.

  11. Place the cast iron skillet on the center rack of your oven, and bake for 10-15 minutes. 10 minutes will give you over easy eggs with runny yolks, and 15 will make the eggs over hard.

  12. Serve, enjoy, and say the word “shakshuka” a bunch of times, because it’s just so much fun!

Whole30 3-Minute Ranch

I believe everyone should make their own mayo and ranch at least once in their life. With this recipe, though, you’ll come back time and time again! Not only is it significantly cheaper than purchasing a Whole30-compatible product, but the taste is sooooo good! I get compliments and requests for my ranch recipe every time I make it, and not just from fellow Whole30-ers.

 
Whatever it is, the way you tell your story online can make all the difference.
 

Ingredients:

  • 1 cup avocado oil

  • 1/3 cup full fat canned coconut milk

  • 1 egg

  • 2 tbsp. red wine vinegar

  • 1 tbsp. lemon juice

  • 1 tsp. sea salt

  • 1 tsp. black pepper

  • 1 tsp. garlic powder

  • 1 tsp. onion powder

  • *** 1 tsp. dried chives

  • *** 1/2 tsp. dried cilantro

  • *** 1/2 tsp. dried parsley

  • *** 1/2 tsp. dried dill


Directions:

  1. Add all ingredients except the 4 green spices (indicated with ***) in a wide mouth mason jar.

  2. Place an immersion blender down at the bottom of the mason jar and blend for 30 seconds.

  3. Pull the immersion blender up and down to incorporate all the oil.

  4. Once everything is well blended, STIR in the 4 green spices.

  5. If you’re using a metal lid, place a small piece of parchment paper between the jar and the lid. Since cilantro chelates metals, you want that barrier to keep your ranch tasting right.

  6. Store the jar in the fridge until the expiration date of your egg (if for some strange reason you don’t eat it by then).

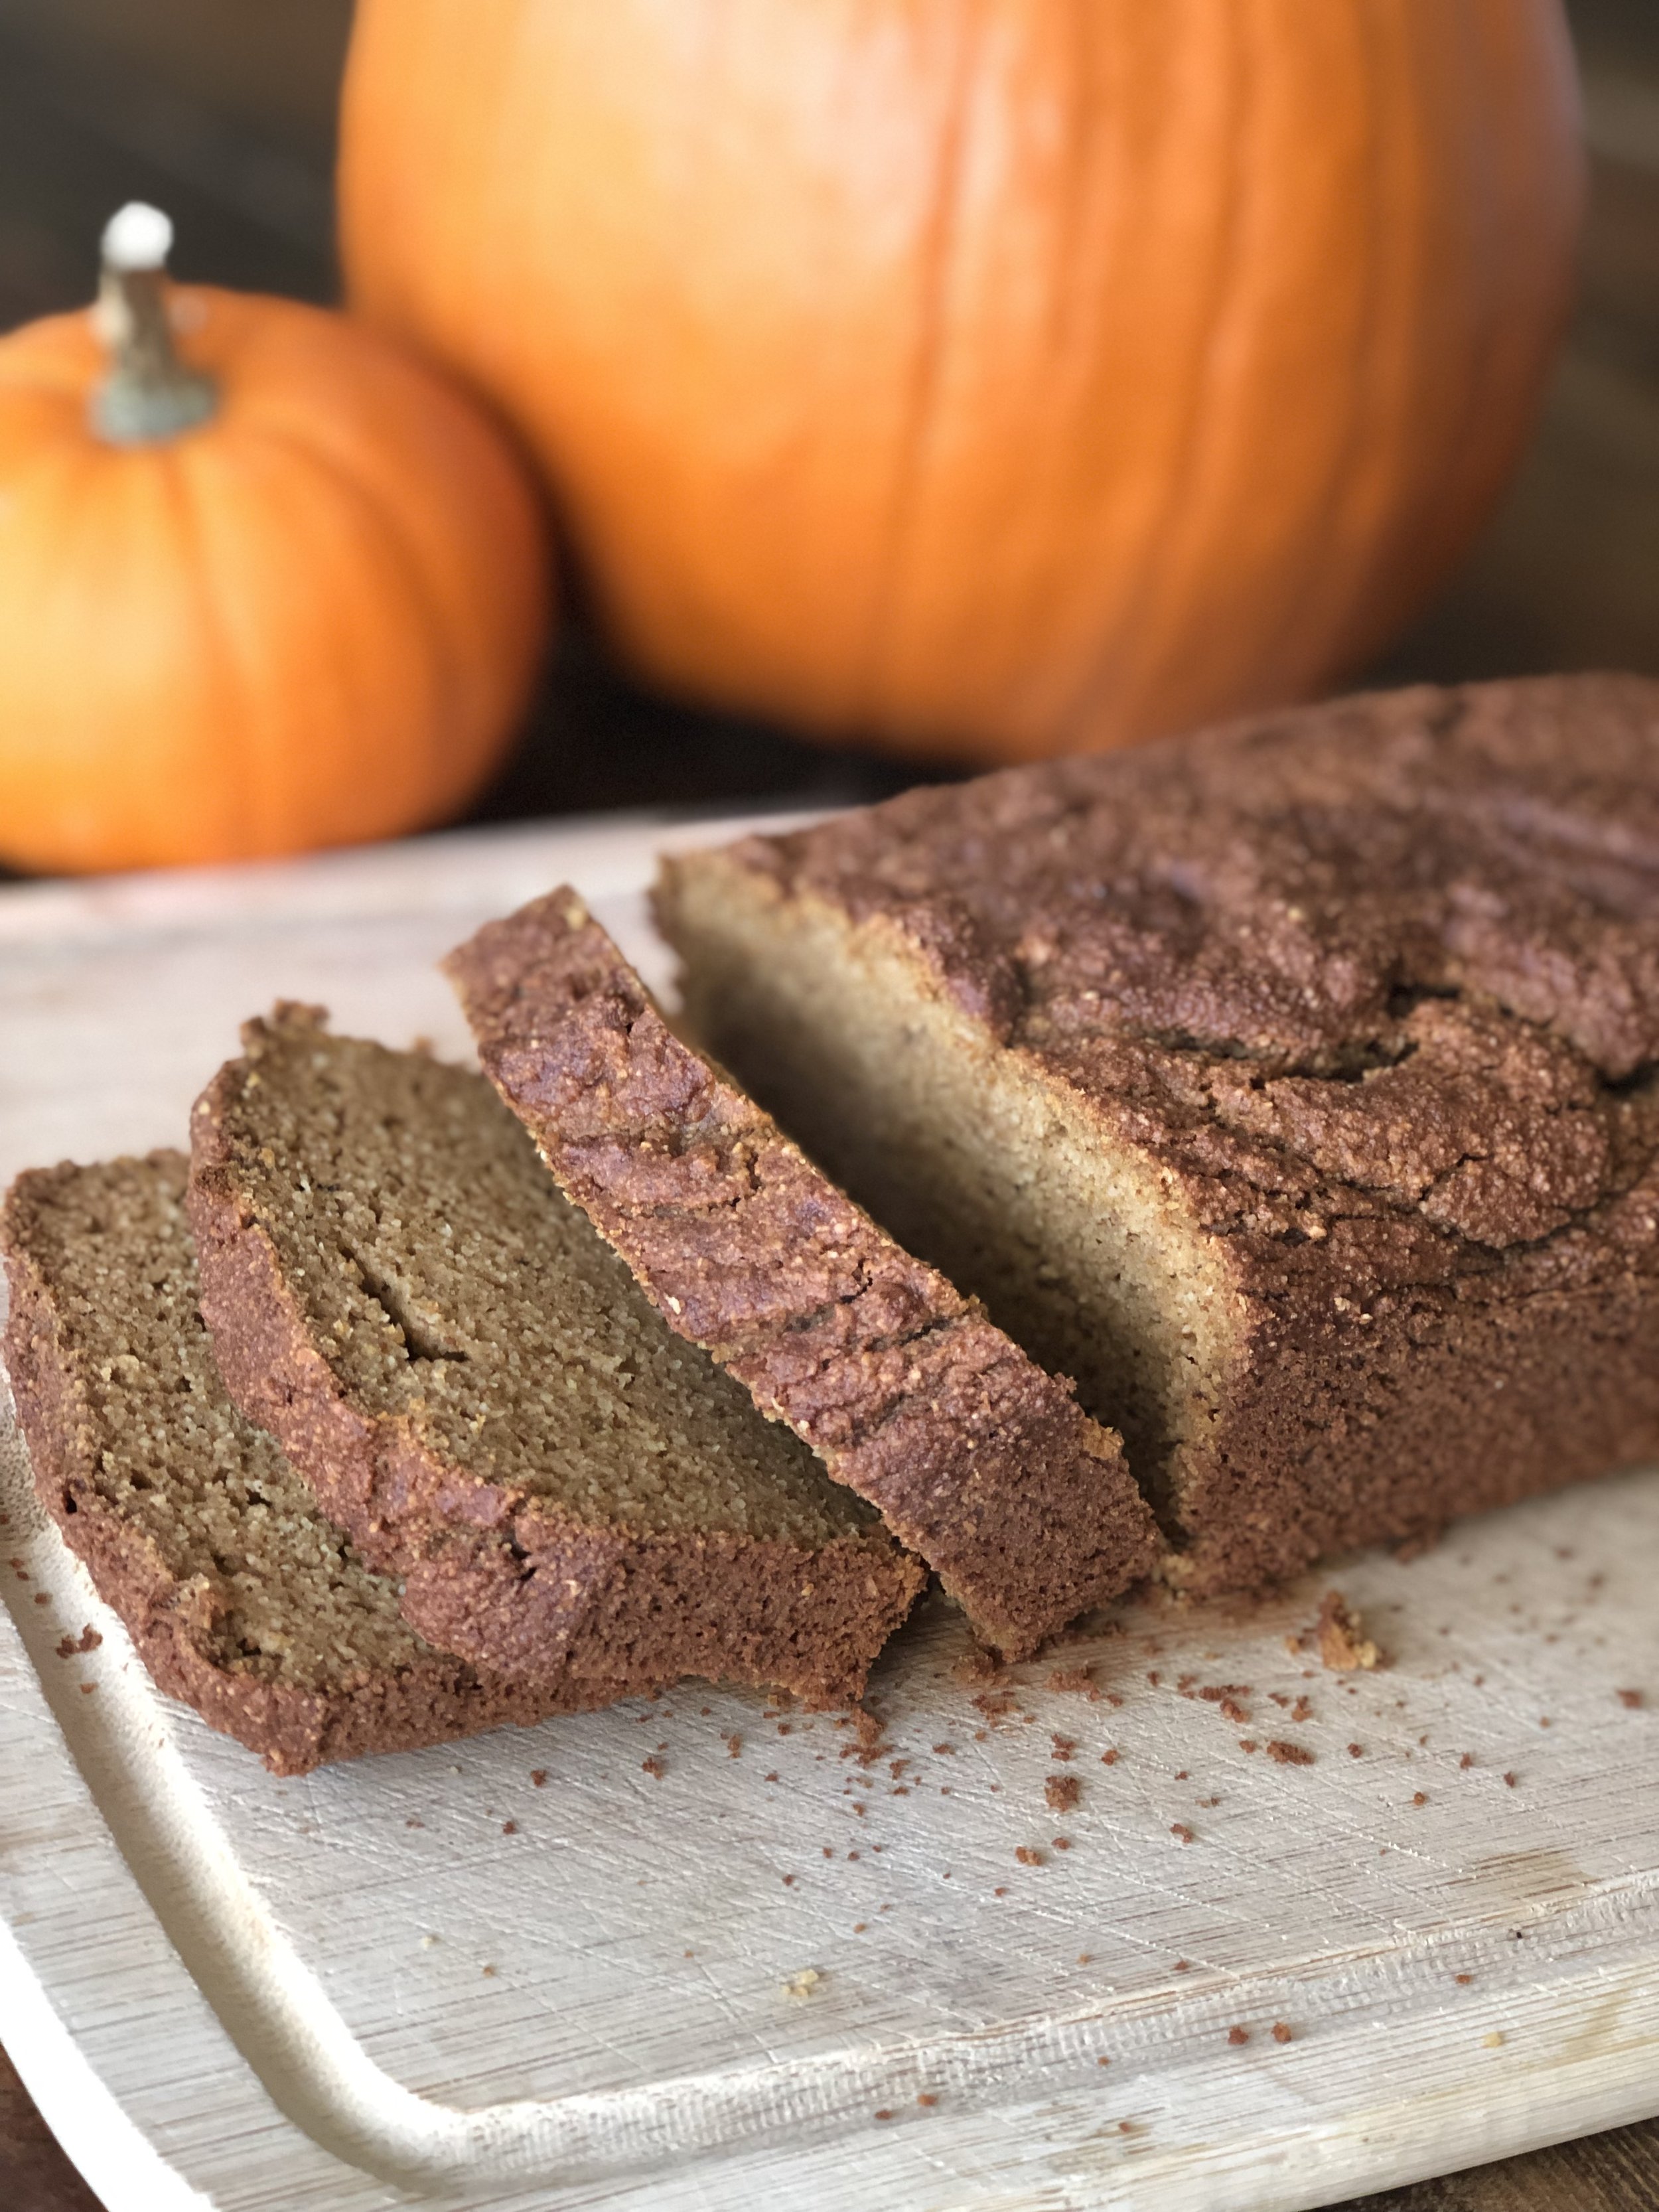
Paleo Pumpkin Loaf

I love fall! The crisp air, bonfires with friends, and, of course, pumpkin spice treats! While I love me some “sweata weatha” (Google that for a good laugh), I also love not having a million dishes to do after baking a fall treat. So, since I’m an #enneagram 1, I found a solution to my problem: Say hello to my blender paleo pumpkin loaf! So easy to make. So tasty. And just a few dishes to clean!

Ingredients:

  • 3/4 cup pumpkin purée

  • 3 eggs

  • 2 tbsp almond milk

  • 2 tbsp creamy cashew butter

  • 1/3 cup maple syrup

  • 1 tsp vanilla extract

  • 1 2/3 cup almond flour

  • 1 tbsp coconut flour

  • 1 tbsp tapioca starch

  • 1 tsp baking soda

  • 1 tbsp pumpkin pie spice

  • 1/2 tsp cinnamon

  • 1 pinch salt

.

Directions:

  1. Preheat oven to 350 F.

  2. Put all ingredients into a standard-sized loaf pan. Seriously. Just dump it all in.

  3. Using an immersion blender, slowly blend all ingredients in the pan. You might need to dirty a spoon and stir it a little to get the liquid and dry ingredients to incorporate.

  4. If you don’t have an immersion blender, OR you want to make a double batch without measuring twice, you can throw everything into a blender or food processor and then transfer to the loaf pan(s). . . You’ll have more dishes to do, but it’ll accomplish the same goal.

  5. Bake the loaf at 350 F for 50 minutes, or until a toothpick comes out clean.

  6. Let cool on a wire rack for 10 minutes.

  7. Using a knife or small metal spatula, loosen the loaf from the sides of the pan (and under, if your spatula can fit).

  8. Place the pan upside down on the wire rack to remove the loaf.

  9. Slice and serve warm, and save any leftovers in the fridge for up to a week.

Garlic and Herb Crusted Chicken Tenders / GF / DF / Whole30


My family LOVES these chicken tenders. Every time I make them my husband says I’m the best cook ever. They really are that good! I’ve included 3 ways that you can make these: in a skillet (preferred), in the air fryer, and baked in the oven. If you don’t mind working harder and making extra dishes to get juicy, crispy chicken tenders, then follow the instructions for pan frying. If the thought of oil splattering all over your kitchen is too much to handle, then follow the baking or air fryer instructions. Whichever method you choose, be sure to dip these in some Whole30 ranch or ketchup!

This recipe is meant for batch cooking, but can be adjusted for less servings. I figure if I am going to have to do a lot of dishes, I better make the most of it and cook 2-3 times what I need for one meal.

Ingredients:

  • 2-3 lbs. chicken tenders

  • 1 cup almond flour

  • 1/2 cup cassava flour

  • 1 tbsp. dried parsley

  • 1.5 tsp. sea salt

  • 1 tsp. garlic powder

  • 1 tsp. onion powder

  • 1 tsp. paprika

  • 1/2 tsp. coriander

  • 1/2 tsp. cumin

  • 3 eggs, whisked

  • 2 tbsp. almond milk

  • Avocado oil

Directions:

  1. Warm a cast iron skillet over medium heat (OR preheat oven to 425°F).

  2. Combine all flours and spices in a bowl and mix with a fork.

  3. In a second bowl, whisk eggs and almond milk.

  4. If pan frying, pour just enough avocado oil to cover the bottom of the skillet.

  5. One at a time, pat a chicken tender dry with a paper towel and dip it in the flour mixture.

  6. Shake off excess flour, then dip the chicken tender in the egg wash.

  7. Allow excess egg wash to drip off, then put the chicken tender back in the flour mixture, being sure to coat it well.

  8. If pan frying, add the chicken tenders to the skillet and cook on each side for about 4 minutes, or until the meat is cooked through and the breading is golden.

  9. Set cooked chicken tenders on a paper towel-lined cooling rack.

  10. Continue for the rest of the chicken tenders, being sure to add more oil as the skillet gets dry.

  11. If baking, place the breaded chicken tenders on a parchment paper-lined baking sheet and bake for 9 minutes at 425°F. Flip the tenders over, and bake for an additional 9 minutes, or until fully cooked.

  12. To make these in the air fryer, cook at 370°F for 15+ minutes.


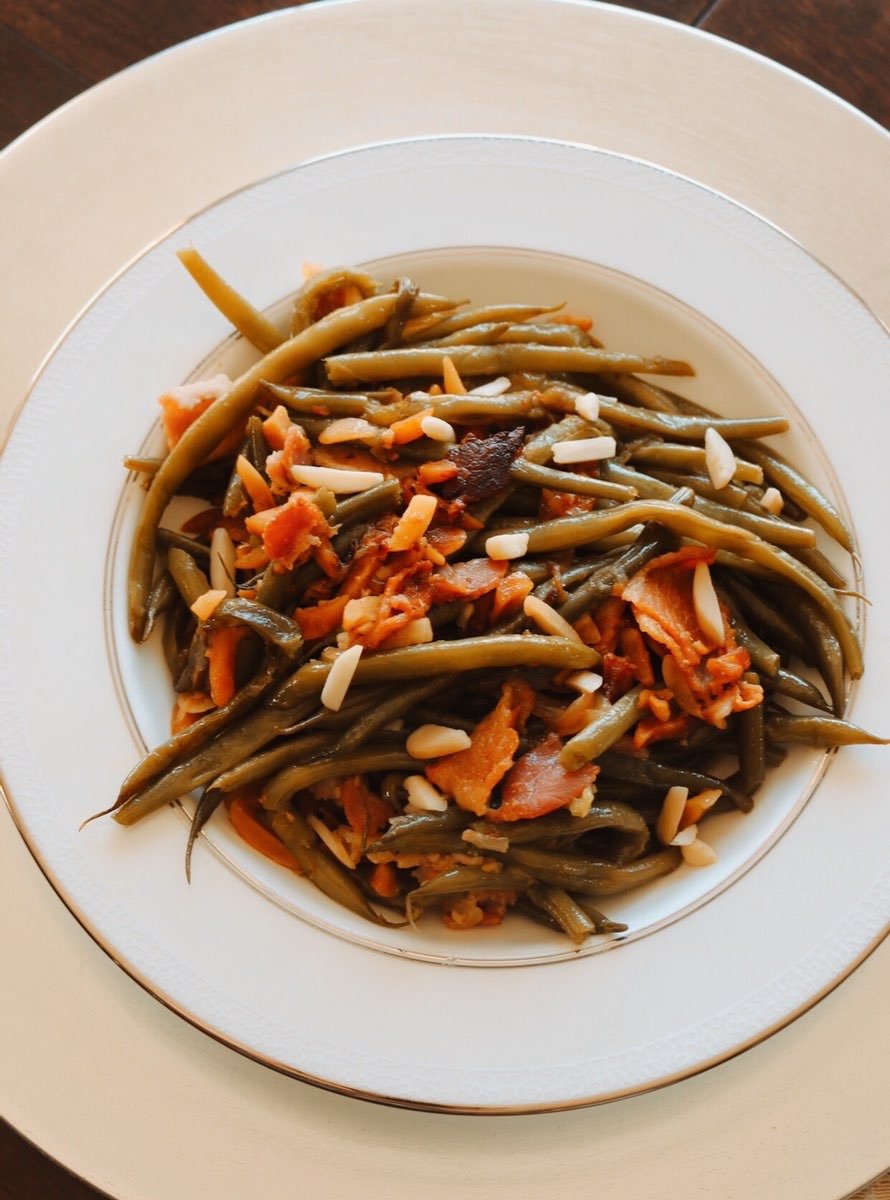
Whole30 Instant Pot Green Beans with Bacon and Almonds

Here’s a quick and easy green bean side for your holiday meals. I love that these cook in the Instant Pot so that I can free up space in my oven for other dishes (hello, turkey!) This recipe can easily be doubled or even tripled if you need to feed a large group, or if you want to use this recipe as part of your weekend #mealprep.


Ingredients:

  • 5 slices Whole30-compatible bacon, cut into 1-inch pieces

  • 1 pound French green beans (you can leave the ends or trim them)

  • 1 yellow onion, thinly sliced

  • 1 tbsp ghee

  • 1 tbsp olive oil

  • 1 tbsp minced garlic

  • 3/4 tsp sea salt

  • 1/2 tsp onion powder

  • 1/2 cup sliced almonds, with more to garnish

Directions:

  1. Wash green beans and trim the ends, if desired.

  2. Press the “sauté” button on your instant pot and put the bacon pieces into your stainless steel pot. Cook the bacon for a few minutes, stirring often to prevent burning.

  3. Once the bacon is cooked to your liking, add the ghee, olive oil, and onion slices to your pot. Allow the onions to sauté for a few minutes while you prepare the rest of your ingredients.

  4. Add in the remaining ingredients (beans, garlic, salt, onion powder, and almonds), and sauté everything for 5 minutes, stirring often to prevent burning and to distribute the seasonings.

  5. Press “cancel” on the instant pot and secure your lid. Make sure the steam vent is on “sealing”.

  6. Select “steam” and change the time to read 5 minutes.

  7. Once the cook cycle has finished, quick release the pressure, by hitting “cancel” and flipping the steam valve over to “venting”.

  8. Allow steam to fully vent before opening the lid.

  9. Sprinkle a few more sliced almonds on top of the green beans before serving.

NOTES: For a Food Freedom option, you can top the green beans with gluten-free fried onions. Aldi usually carries an organic, clean version of French’s Fried Onions, and they’re really good!

Whole30 Stuffed Mushrooms

I loved eating at my best friend’s house as a kid because her mom cooked everything from scratch. Around the holidays, she served these stuffed mushroom appetizers, and they were my favorite! I substituted the non-compatible ingredients in the original recipe for a creamy, tangy Whole30 filling, and, boy, is it delicious! This recipe is written to entertain a small gathering (6-10 people), but you can always adjust the ingredients to make less (or more). Whether you serve these for #friendsgiving or on a random weeknight, I hope you’ll love them as much as my family does.


Ingredients:

  • 24 oz. baby bella mushrooms

  • 1 tbsp. ghee

  • 1/2 cup mayo

  • 1 tbsp. minced garlic (about 6 cloves)

  • 1 tbsp. nutritional yeast

  • 1 tbsp. coconut aminos

  • 1/2 tbsp. lemon juice

  • 1 tsp. dried dill

  • 1/2 tsp. onion powder

  • 1/2 tsp. garlic powder

  • 1/4 tsp. salt

  • 1/4 tsp. pepper


Directions:

  1. Wash mushrooms and carefully remove the stems from the caps. Place them in separate piles on a kitchen towel to dry.

  2. Warm a skillet over medium heat and add 1 tbsp ghee.

  3. Finely chop mushroom stems and sauté in ghee for 5 minutes until fragrant and tender. Set the mushroom caps aside to stuff later.

  4. While the mushroom stems are cooking, make stuffing mixture by combining mayo, garlic, nutritional yeast, coconut aminos, lemon juice, and all spices together in a bowl.

  5. Allow the sautéed mushroom stems to cool a bit, then add them to the mayo mixture and stir well.

  6. Spoon the mixture inside the mushroom caps and set in your air fryer basket.

  7. Cook in the air fryer at 400°F for 10 minutes.

NOTES: Don’t have an air fryer? Follow all the steps to make the mushrooms, then bake them at 350°F for 20-25 minutes. Broil for one minute to brown the tops.

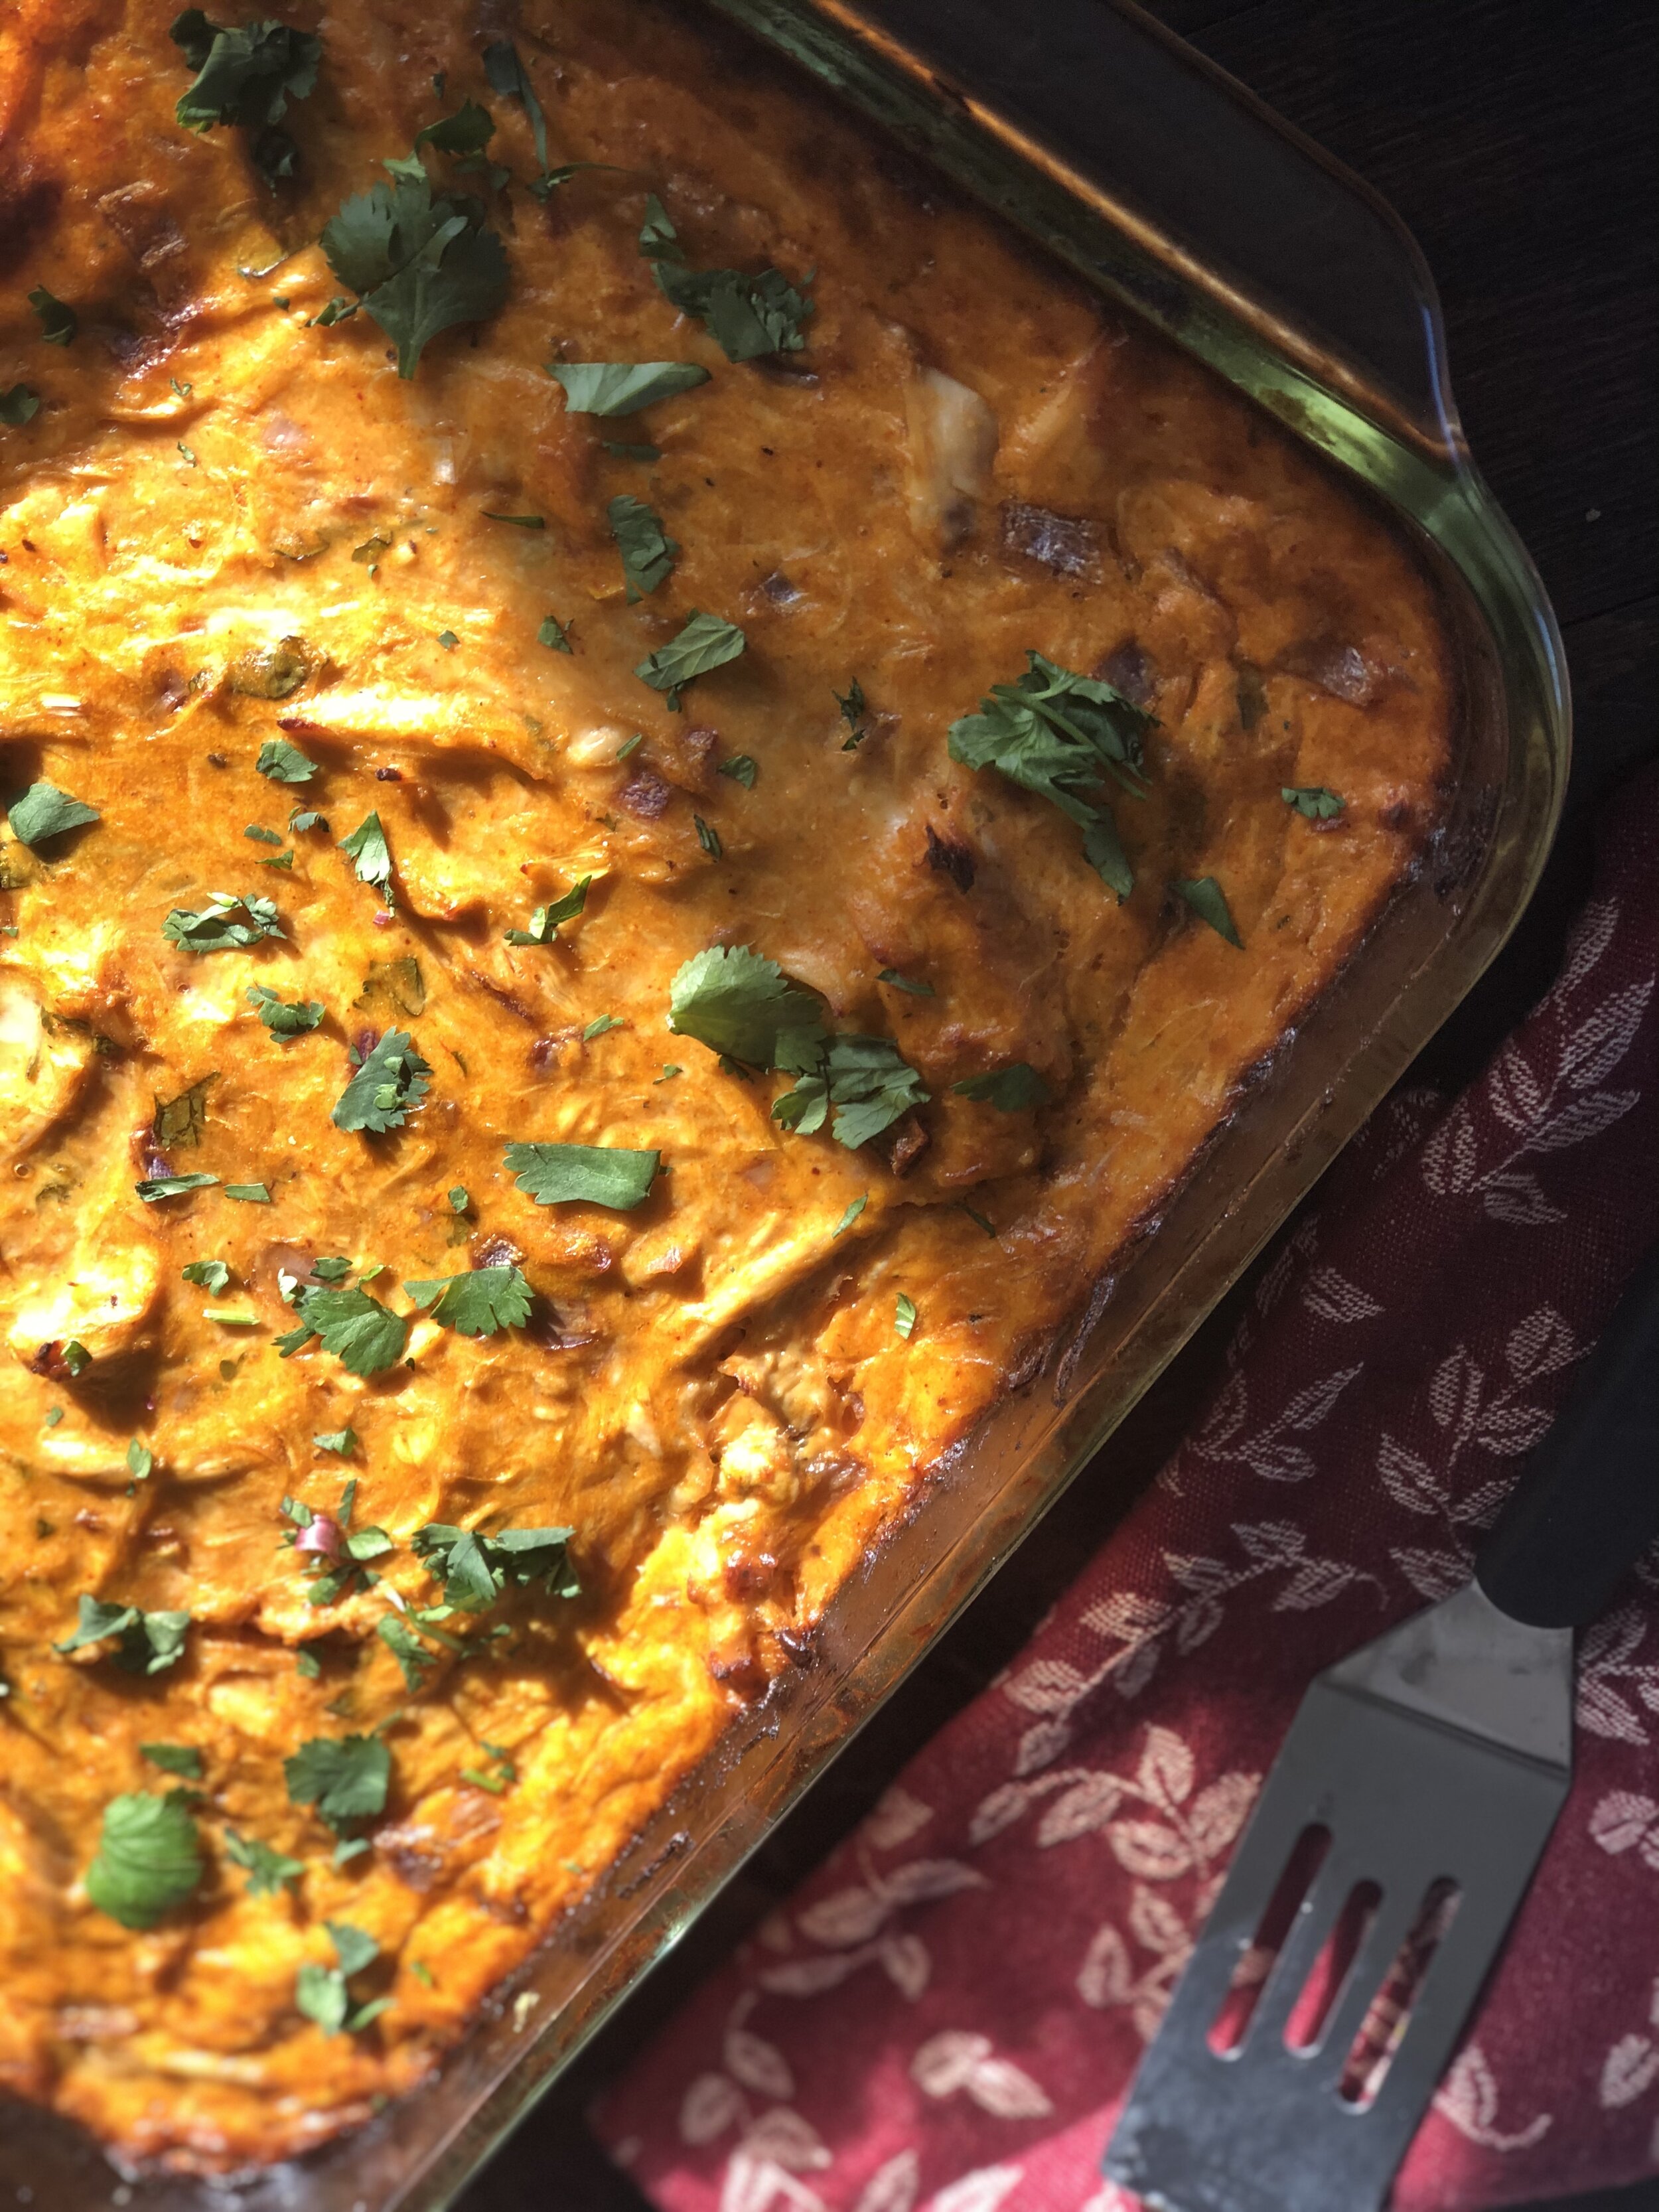
Whole30 Copy Cat CPK BBQ Chicken (Pizza) Spaghetti Squash Bake

Ok, I admit the title is a little confusing, (feel free to send me your ideas LOL) but hear me out . . . Prior to changing my diet and lifestyle with the Whole30, I used to LOVE the BBQ Chicken Pizza at California Pizza Kitchen (CPK). While I am all about treating myself to my favorite foods, if and when I feel they’re worth it, I wanted to come up with a healthier, gluten-free and dairy-free recipe that would satisfy. This spaghetti squash bake checks all those boxes, it’s perfect for utilizing leftovers, AND can be doubled or tripled for batch cooking. Winner, winner, CPK chicken dinner!

 
IMG_0511.jpg
 

Ingredients:

  • 1 large or 2 small spaghetti squash

  • 1 tbsp. olive oil

  • 1 small red onion, finely diced

  • 3-4 cups cooked, shredded chicken (I used leftovers from Whole roasted chickens I made earlier in the week)

  • 1/2 tsp sea salt

  • 2 tbsp nutritional yeast

  • 1 cup mayo

  • 1 cup bbq sauce (I love the Smoky BBQ Sauce from The New Primal)

  • 1/4 cup chopped cilantro, plus some to garnish

  • 1 tbsp lemon juice

  • 2 tbsp tapioca starch

  • 5 eggs

IMG_4331.jpg
 

Directions:

  1. Preheat oven to 400F and line a baking sheet with parchment paper.

  2. Cut spaghetti squash in half lengthwise, and scoop out and discard the seeds.

  3. Drizzle spaghetti squash flesh with olive oil and sprinkle with salt and pepper. Then place them flesh-side down on the parchment paper.

  4. Bake squash for 30-35 minutes.

  5. Grease a 9x13 baking dish with olive oil.

  6. Once the squash have cooked, use a fork to scrape out the spaghetti flesh, and then add to the baking dish. Lower the oven temp to 350F.

  7. Add the chicken, diced red onion, salt, nutritional yeast, mayo, BBQ sauce, cilantro, lemon juice, and tapioca starch into the baking dish and stir well.

  8. Whisk the 5 eggs and then add them to the baking dish. Stir well, being sure the egg gets evenly distributed, and you don’t see big pockets of it.

  9. Bake the dish uncovered for 1 hour at 350F. Let it stand for 5-10 minutes before devouring.

 
IMG_4336.jpg
 

Notes:

  • This recipe warms up like a dream, making it perfect for part of your meal prep! Try it for breakfast when you’re tired of eating eggs on your Whole30.

  • I used The New Primal Smoky BBQ sauce, but any sauce will do. If you want to save 15% on your order at The New Primal, you can use my affiliate link and code “COACHKELLY” at checkout.

  • I highly suggest drizzling some BBQ sauce on top of your slice before serving. I didn’t think about it until after I took some of the pictures of the bake, but it definitely gives a flavor punch.

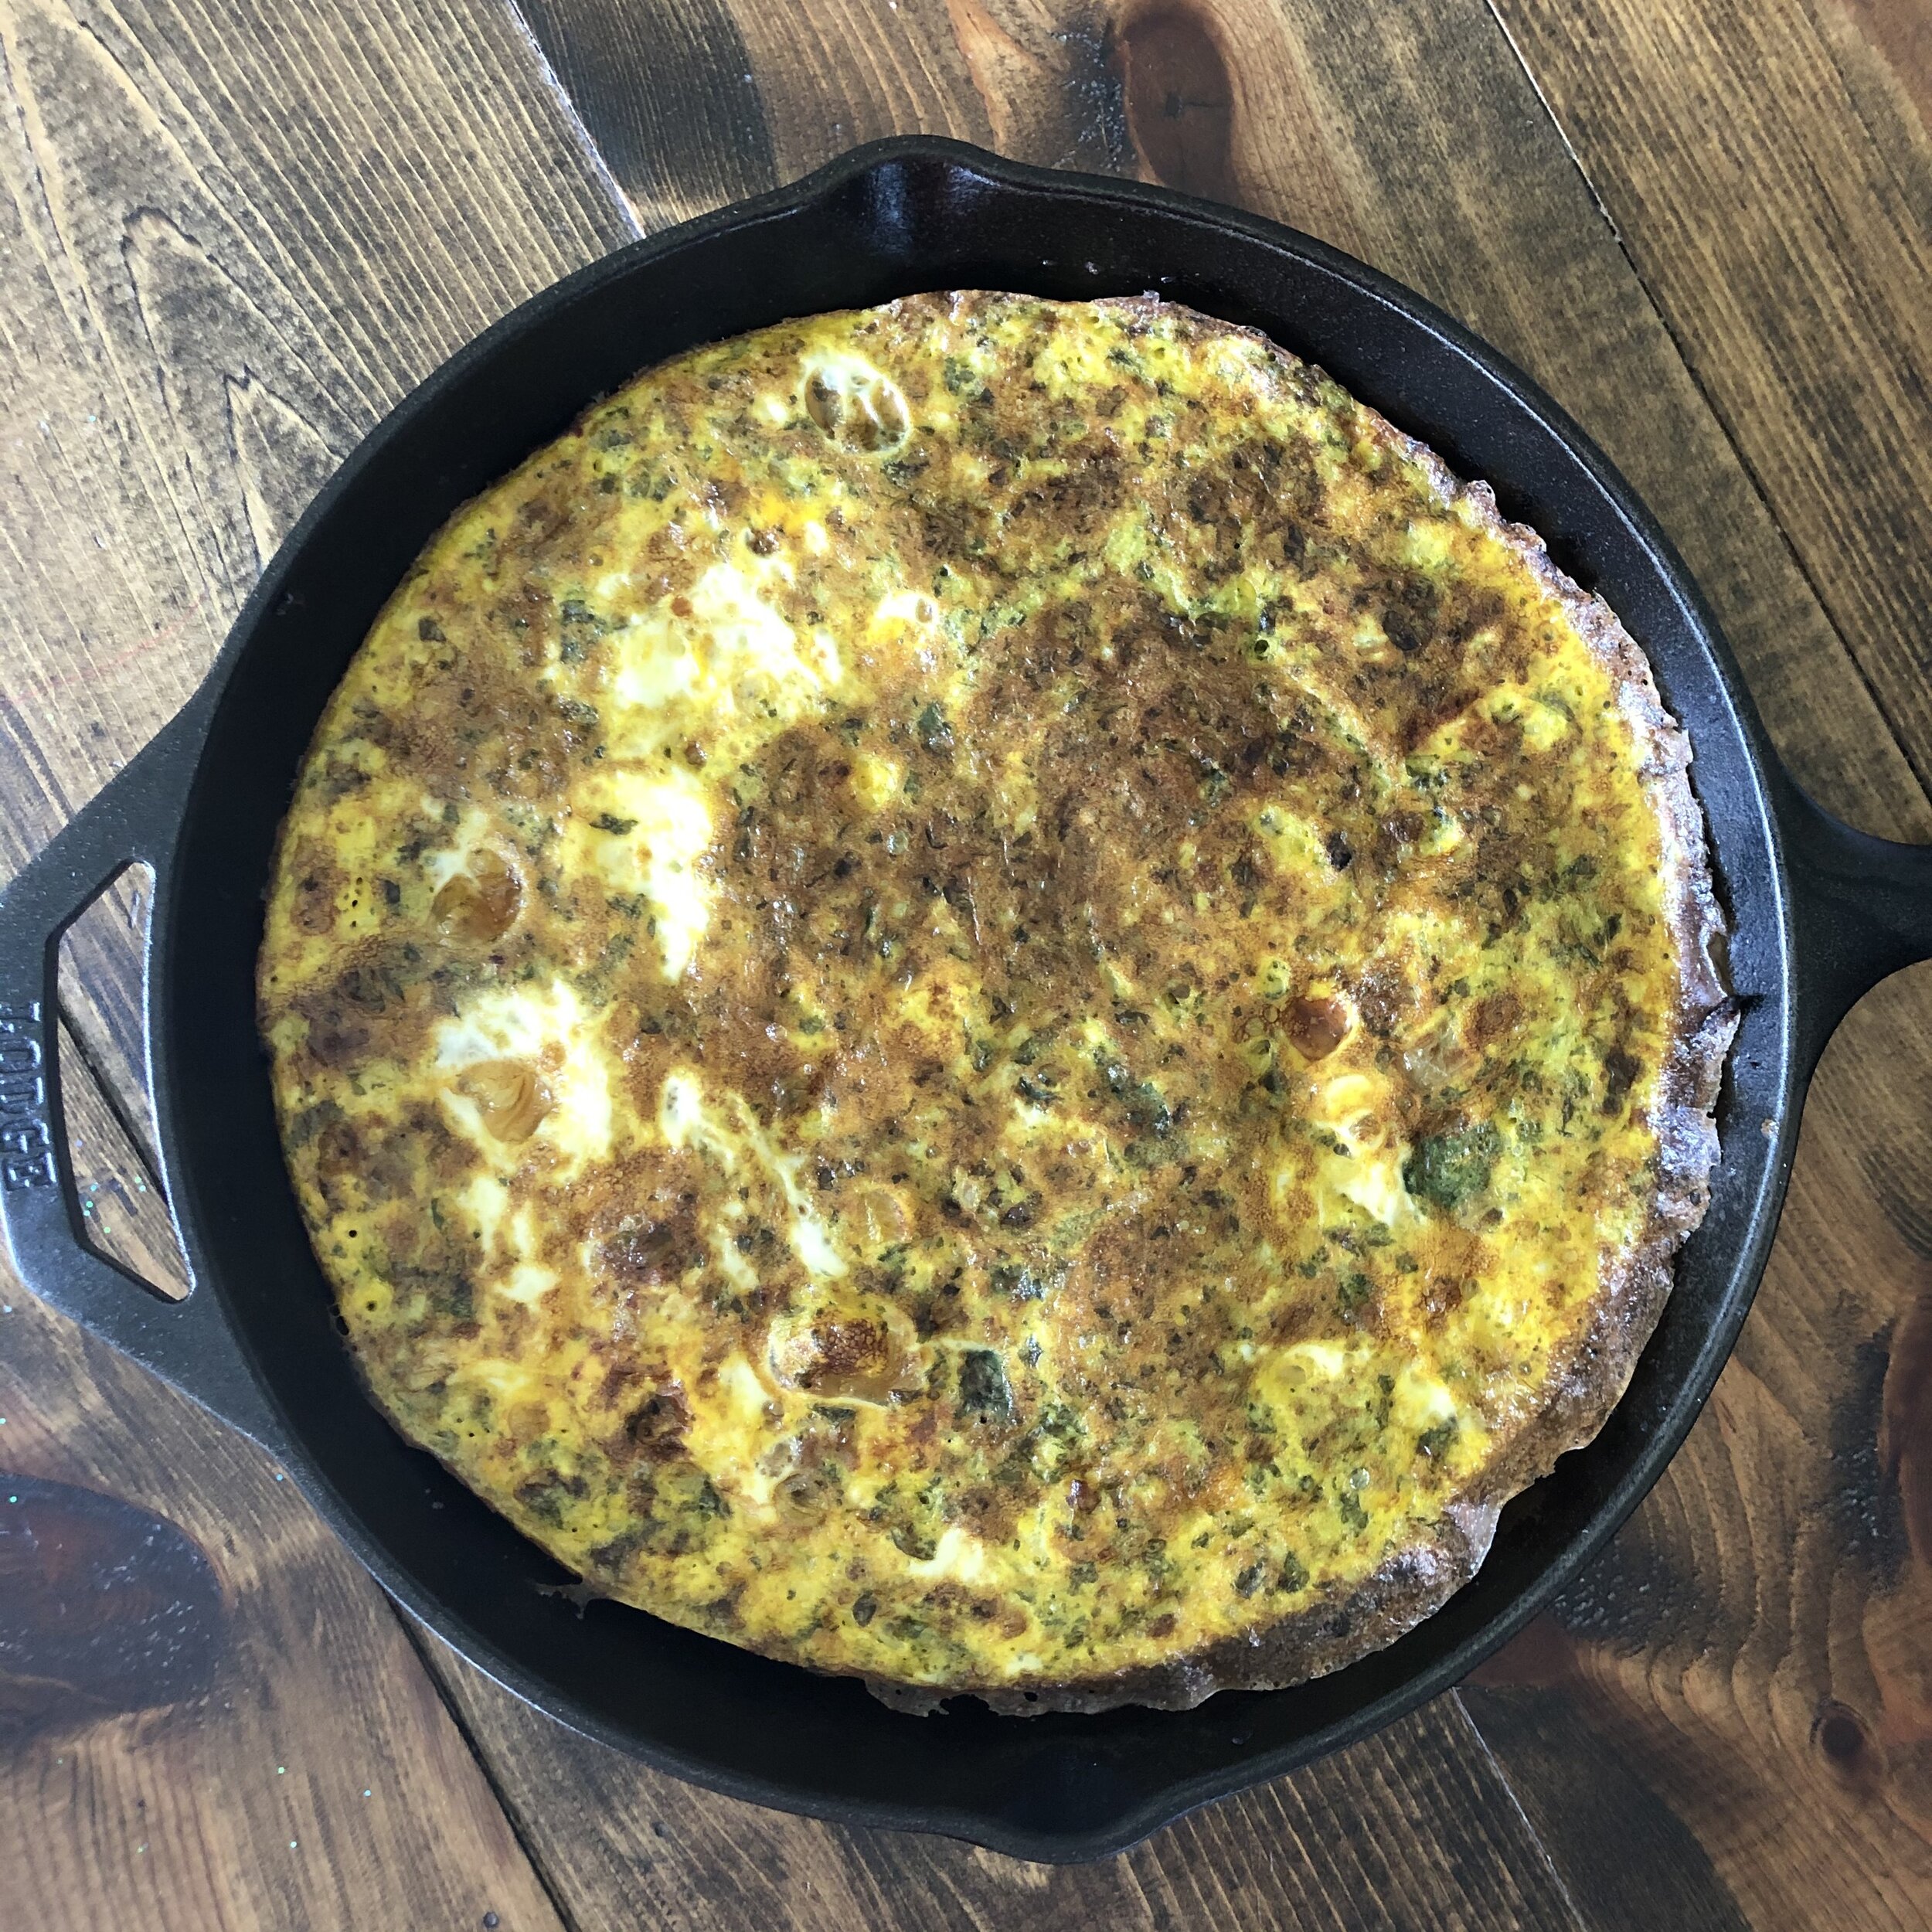
Whole30 Frittata - A Meal Prep Life Saver!

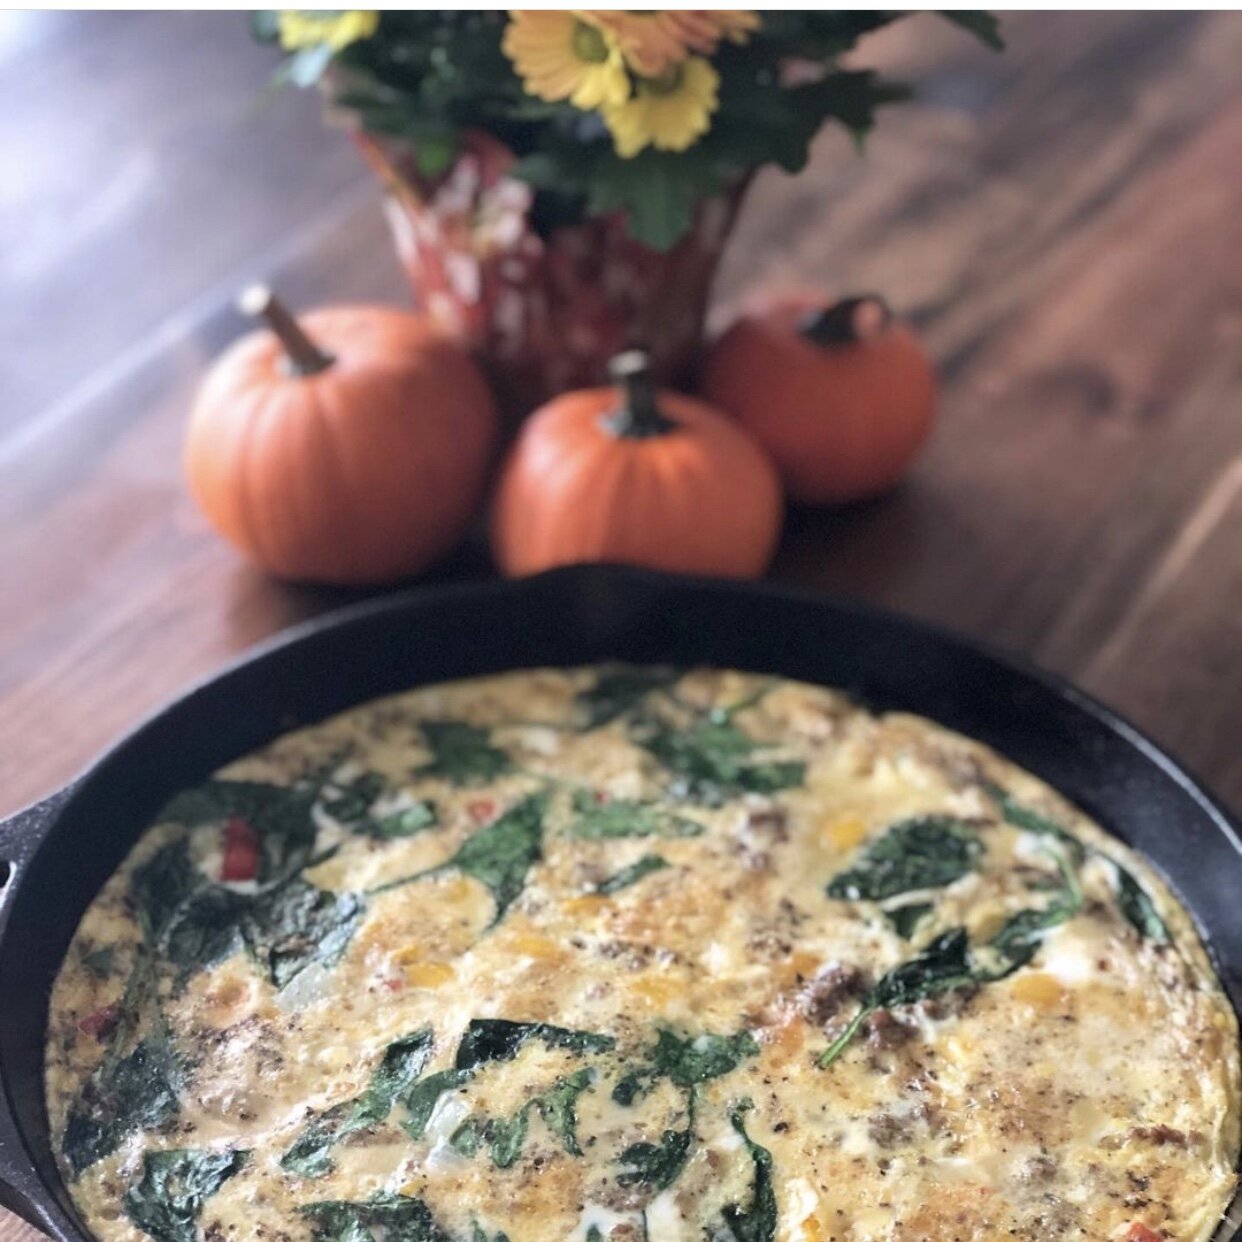
Prior to doing my first Whole30 in 2015 I only knew how to make cereal, bagels, and PopTarts for breakfast. I’d like to say it’s because I was a teenager or young adult, but I was thirty-two, y’all . . . 32!!!!! I started that first round of Whole30 making breakfast every morning, alternating between scrambled eggs and fried eggs, and I quickly learned that my success was going to dependent upon mastering the art of meal prep. I didn’t fatigue of eggs themselves (I could eat them multiple times a day, every day!), but I grew tired of having to cook first thing in the morning. Oh, and the dishes! For the love of Pete, I needed to find a way to cut down on the number of dishes I had to do after being up all night with a baby and having to wrangle a toddler all day. Enter the frittata! I started making a frittata every Sunday while my toddler napped, and would reheat the slices all week for my Whole30 breakfasts. To say it was a game changer would be an understatement! What started as a simple way to save time (and dishes) in the kitchen, turned into a passion project, as I shared my weekly frittata recipes with my community on social media. My hashtag Coach Kelly Frittata of the Week (#coachkellyfotw) has lots of variations of this same basic recipe here. Don’t like onions? Leave them out! Don’t have bell peppers? Substitute them for slices of yellow or zucchini squash. Want to add tons of flavor? Swap out the water for bone broth or my chimichurri. Your options are nearly infinite! Whether you aim for a Greek flavor with olives and ground lamb, or you use your leftover taco meat with some pico de gallo, you will love the versatility and adaptability of this simple Whole30 staple. Be sure to comment on this post with your favorite combinations and tag me in your creations on social media!


Ingredients:

  • 12 eggs, whisked

  • 1/2 cup water or bone broth

  • 1 pound Whole30 compatible ground breakfast sausage (or try bacon, diced chicken, or leftover taco meat!)

  • 1 yellow onion, chopped

  • 1 red bell pepper, diced

  • 1-2 large handfuls of spinach and/or arugula

  • Salt and pepper, or your favorite seasoning blend to taste (optional)


Directions:

  1. Warm up a cast iron (or oven safe) skillet on medium heat.

  2. Add your sausage to the skillet and begin browning. Prepare your eggs, by whisking them in a bowl and adding water or bone broth, while you wait for your sausage to cook.

  3. Once the sausage is almost cooked through, but still a little pink, scoot it to the side of your skillet. Pour off or soak up any excess grease with a paper towel, being sure to leave a little for sautéing.

  4. Add the chopped onion to the skillet, and sauté for 2-3 minutes. Combine the onion with the sausage, and scoot it to the side to make room for the peppers.

  5. Add the diced bell peppers to the skillet, sauté for 2-3 min, and combine with the sausage and onion.

  6. Add 1-2 handfuls of spinach and/or arugula to the skillet and stir until wilted.

  7. Sprinkle with salt and pepper or your favorite seasoning blend (optional) and give everything one final stir.

  8. Pour your whisked eggs into the skillet, and leave them alone.

  9. Cook the frittata on the stove top for 5-10 minutes, or until the eggs begin to set. You may want to tilt the frittata to see if any eggs run off. It’s ok if there is a little bit of runny egg on top, but you want the sides pretty firm before broiling.

  10. Finish the frittata in the broiler for 2-3 minutes, or until the eggs are fully cooked through and the top is golden.

Notes:

  • If you don’t have a cast iron skillet, you can make this in a baking dish. You will have to fully cook whatever protein and veggies you use in a skillet, and then transfer them to a greased baking dish. Then, add your whisked eggs on top and bake at 350 for 25-28 minutes before finishing it under the broiler for a few minutes.

  • The basic recipe is to cook your protein in the skillet, add veggies and greens, season it, and finish by adding the eggs. Get creative with what ingredients you use and trust that you can’t mess this up!

Whole30 Roasted Chicken

I would have never cooked a whole chicken, had it not been for the Whole30. I am so glad I pushed past my fears of touching an entire, raw chicken, because I have come to love the flavor and versatility of roasted chickens. They’re perfect for batch cooking (so that you have leftovers for chicken salad or spaghetti squash bake), and they are really easy to make. I love roasting some veggies and potatoes on a sheet pan for the last 30-40 minutes of cook time, for an easy dinner. This is my go-to recipe for meal trains, when I sign up to bring a meal to a new mom or someone at our church, who is in need. I stick with just salt and pepper, but you can switch things up and try your favorite seasoning blend, to give it some personality.

 
roasted chicken.png
 

Ingredients:

  • 1 (or more) whole chicken(s)

  • 1 apple

  • 1 onion

  • optional: other produce you have on hand, such as carrots, celery, or lemon slices

  • optional: you can also throw some chopped potatoes around the chicken in the baking dish to eat with the chicken.

  • ghee to taste (~ 1-2tbsp per chicken)

  • salt and pepper to taste


Directions:

  1. Preheat oven to 425F.

  2. Remove giblets from inside chicken (if necessary), and place in a baking dish with the breasts UP.

  3. Cut your apple and onion into slices/wedges. Place a few slices of each inside the chicken, and then lay the rest around the chicken in the baking dish. (If you are using other produce, such as carrots, celery, and lemon slices, you’ll want to place them inside and around the chicken as well.)

  4. Rub ghee all over the outside skin and under the skin.

  5. Sprinkle chicken with salt and pepper to taste.

  6. Place chicken in your preheated oven and immediately bring down the temperature to 375 F.

  7. Bake at 375 for 1.5 hours.

  8. Use a meat thermometer to make sure that the chicken is fully cooked, then cover with foil, and let rest for 30 minutes.

Notes:

  • We love eating the chicken as is the first night and then shredding the rest of the meat to utilize later in the week.

  • Don’t forget to make bone broth with your bones to make the most of your chicken and stretch your budget.

Whole30 Chicken Salad

I hesitate calling this a recipe, because I don’t have exact measurements for the ingredients, but it is one of my family’s go-to recipes for meal prep and parties, so I feel compelled to share. There’s nothing fancy about it, but it is perfect for breakfast, cold lunches at the office or on-the-go, and for when you want something to serve at a gathering that can be prepped ahead of time. Be sure to check out my easy roasted chicken recipe, too, because the leftovers make for a delicious chicken salad. You can use canned or rotisserie chicken from the grocery store, too, but I personally prefer my roasted chicken. Be sure to grab my 1-minute mayo recipe, or you can substitute your favorite mayo from the store (Just be sure to read labels carefully if you are doing the Whole30).

 
IMG_6226.jpg
 

Ingredients:

  • ~ 6 cups of fully cooked chicken

  • ~ 1 cup Whole30 compatible mayo

  • ~ 1/4 cup Whole30 compatible dijon mustard

  • ~ 1-2 cups red grapes, halved

  • ~ 1 cup diced celery

  • ~ 1/2 cup chopped walnuts

  • salt and pepper to taste

~ Please note that these are estimates, and you may prefer more or less. I just eyeball the ingredients and taste it a bunch of times (with a different fork) as I am making it.

Directions:

  1. Add all ingredients into a large mixing bowl and mix well.

  2. Adjust everything to taste, as needed.

Whole30 1-Minute Mayo (and Hot Dip)

I have never liked mayo, but I eat this by the spoonful! Whether you need mayo to make chicken salad, kid-friendly lettuce wraps, or to have on hand as a condiment, this 1-minute recipe is so easy! No need to use a room temperature egg or drizzle in oil . . . just throw four ingredients into a wide-mouth jar and blend with an immersion blender. Take it a step further and make my famous* “hot dip”, by adding your favorite hot sauce.

*and by famous, I mean all four of my kids are OBSESSED with my hot dip, and literally dip everything in it (even apples and cantaloupe).

 
Whatever it is, the way you tell your story online can make all the difference.

Whatever it is, the way you tell your story online can make all the difference.

Ingredients:

  • 1 cup avocado oil

  • 1 large egg

  • 1 tbsp lemon juice

  • 1 generous pinch of salt

  • For hot dip, add your favorite hot sauce to taste (I recommend starting with 2 tbsp, and stirring in more after it’s blended)


Directions:

  1. Add all ingredients to a wide mouth jar (make sure the opening is big enough to fit in your immersion blender).

  2. Place an immersion blender all the way down to the bottom of the jar.

  3. Holding it at the bottom, blend on high for 30 seconds.

  4. Slowly pull the immersion blender up, tilting it from side to side, until all of the oil has been incorporated.

Notes:

  • I like to make a double batch of mayo, then use or separate what I need as mayo, and then simply stir in hot sauce to make Hot Dip.

  • Instead of measuring my hot sauce I usually count the number of “spanks”, and aim for 40-50 spanks per batch.

  • Store leftover mayo/hot dip in the fridge. I use the expiration date on my egg carton for the expiration date of the mayo, but we eat it so frequently that I never go more than a week in my fridge.

  • Concerned about consuming a raw egg? Don’t worry, the acidity of the lemon juice will neutralize anything potentially harmful. Of course, use common sense and don’t let it sit out at a July picnic, though.

Whole30 Chimichurri

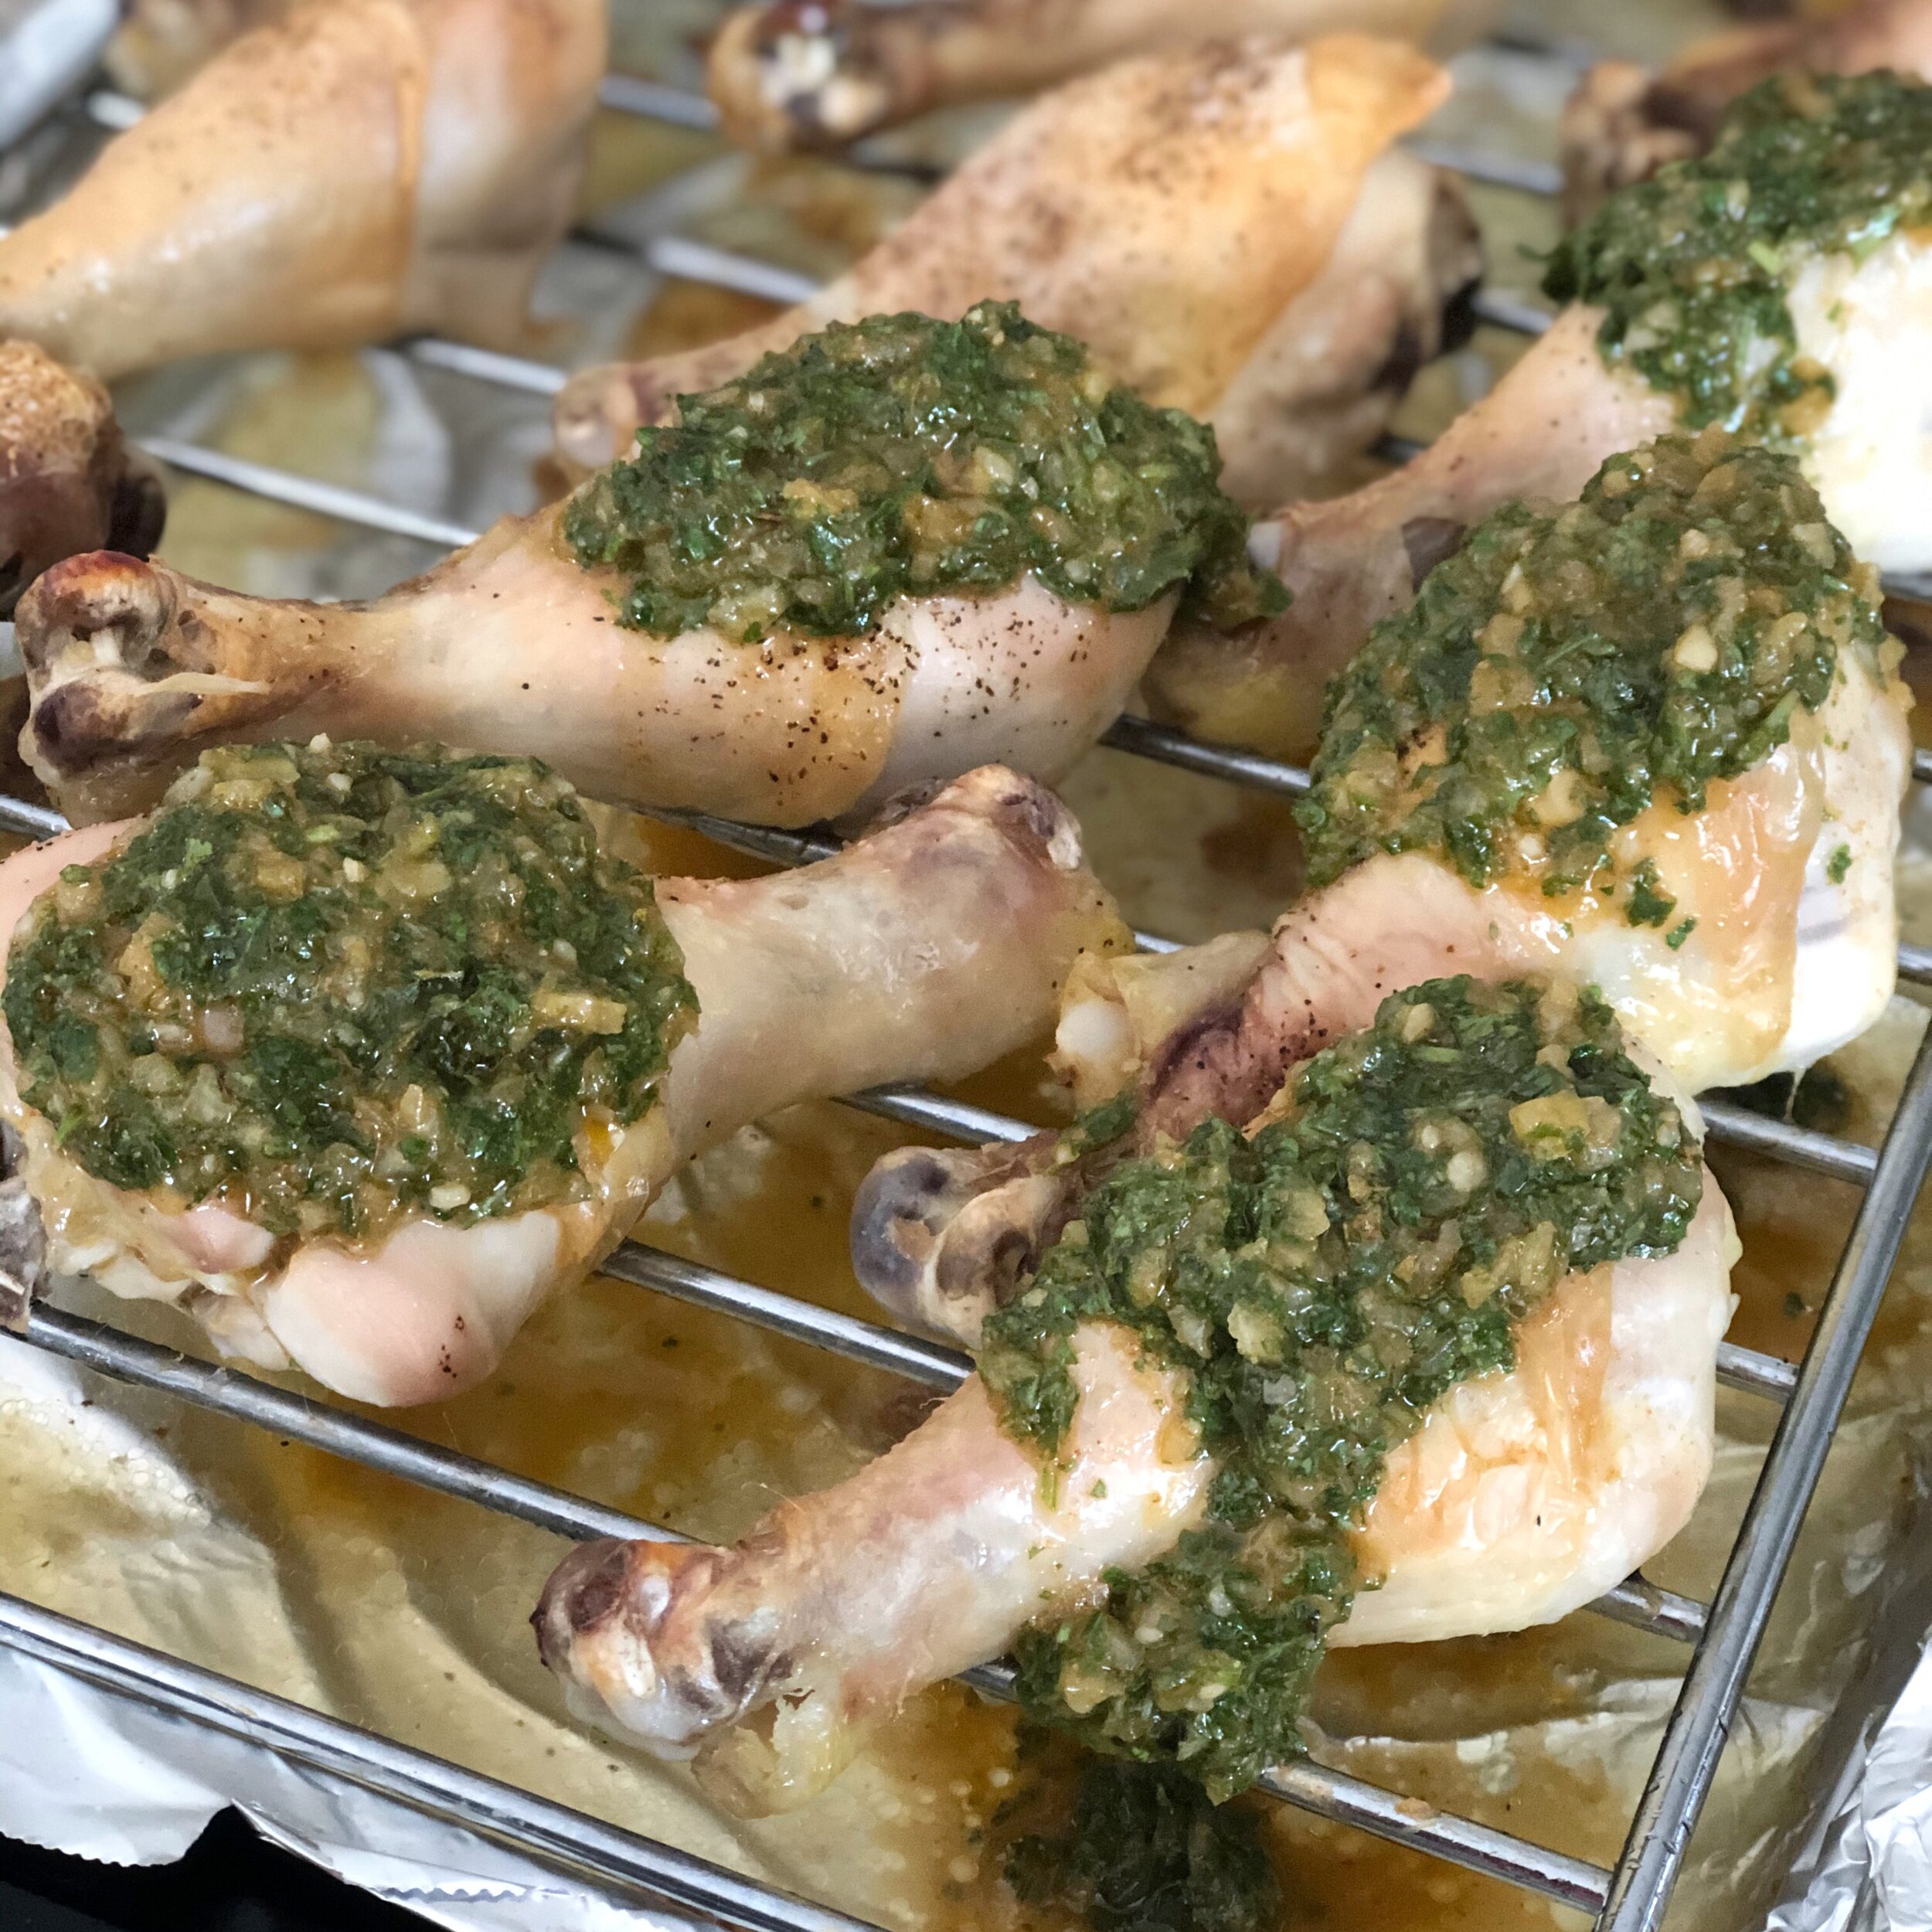
My summer garden is growing, which means harvest is right around the corner! I absolutely love being able to pick fresh parsley, cilantro, and basil from my backyard and make a quick and easy chimichurri sauce. It is delicious on top of chicken drumsticks and wings, makes really tender steak when you marinate it overnight, and adds some pizazz to my weekly breakfast frittata. With basic pantry ingredients that you likely have on hand, and fresh, seasonal produce, this is inexpensive to make, too!


Ingredients:

  • 1/2 cup chopped yellow onion

  • 2 tbsp lemon juice

  • 2 tbsp red wine vinegar

  • 2 tsp minced garlic

  • 1/2 cup fresh parsley leaves

  • 1/2 cup fresh cilantro leaves

  • 1/2 cup fresh basil leaves

  • 1/4 cup olive oil

  • 1 tsp sea salt

  • 1/2 tsp cumin

  • 1/2 tsp coriander

  • 1/2 tsp dried oregano

  • 1/2 tsp paprika

Directions:

  1. Add the chopped yellow onion, minced garlic, lemon juice, and red wine vinegar to a small bowl, stir well, and set aside while you prepare the rest of the ingredients.

  2. In a separate small bowl, mix together sea salt, cumin, coriander, dried oregano, and paprika, and set aside.

  3. Dump the entire bowl of onions and garlic into a food processor or blender, then add the fresh parsley, cilantro, and basil leaves, and secure the lid.

  4. “Pulse” the mixture 10-15 times, until the leaves are chopped.

  5. Add in the olive oil and secure the lid again.

  6. Blend for a minute or so, pausing to scrape down the sides a few times, if needed.

  7. Add in the spice mixture, and pulse a few times to distribute.

  8. Serve as a sauce over meat, eggs, or even roasted veggies. You can also marinate meat in the sauce overnight for a tender and flavorful dish. I also love making my basic frittata recipe with it, too.

  9. Store in the fridge for a week.


Whole30 Slow Cooker Green Chili Chicken

If you’re needing an EASY Whole30 meal with ingredients that you likely have on hand, look no further! This 6-ingredient meal is perfect for busy nights when you want dinner ready and waiting for you when you come home. If you don’t have a slow cooker, OR you want to quickly cook dinner as soon as you get home from work, you can easily adapt this recipe for the Instant Pot, Check out the notes at the bottom of the recipe for details. Until then, happy Taco Tuesday!

green chili chicken.png
 

Ingredients:

  • 1.5 pounds of boneless, skinless chicken thighs

  • 1 yellow onion, diced

  • 1 jar of salsa verde or 2, 4oz cans of mild green chilis

  • Salt to taste

  • Pepper to taste

  • Cumin to taste

Directions:

  1. Place chicken thighs in your slow cooker.

  2. Generously sprinkle salt, pepper, and cumin on the chicken.

  3. Add the diced yellow onion on top.

  4. Pour the jar of salsa verde (or cans of green chilis) on top of the chicken, and secure your lid.

  5. Cook the chicken for 4-5 hours on low, or until completely cooked through.

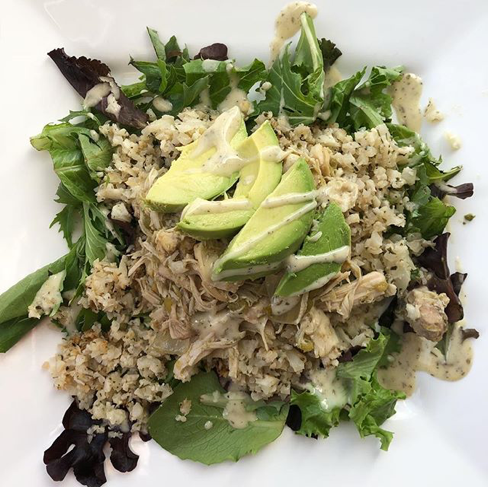
  6. Shred with a fork and serve the chicken with some of the broth over cilantro lime cauliflower rice. For added veggies, put everything over a bed of greens with your favorite Whole30 ranch.

Notes:

To make this in the Instant Pot, simply add all ingredients to your IP, secure the lid, and cook on HIGH pressure for 10 minutes. Allow the pressure to release naturally for 10 minutes, then press “Cancel”, move the vent to “Venting” and allow the pressure to finish releasing before opening the lid. Shred the chicken and serve with the above suggestions.

IMG_4882.jpg

Whole30 Cilantro Lime Cauliflower Rice

Dinner does not have to be complicated! Layering various types of veggies, then adding a protein source and healthy fats is a super simple way to eat healthy meals without the hassle. This Cilantro Lime Cauliflower Rice is the perfect base for layering ingredients, whether it’s Taco Tuesday or not. In this recipe, you’re welcome to rice your own fresh cauliflower, but this busy homeschool mom needs the convenience of frozen cauliflower rice (Who’s with me?). The benefit to using frozen is that I always have the ingredients on hand for those nights that I’m wondering at 5 o’clock, “What’s for dinner?” Add leftover protein on top (like my Slow Cooker Green Chili Chicken), or quickly brown some ground beef, and dinner is ready in minutes.

IMG_4941.jpg
 

Ingredients:

  • 1 head of cauliflower, or about 16 oz. frozen cauliflower rice

  • 1 heaping tablespoon of coconut oil

  • 2 tablespoons lime juice (fresh or refrigerated)

  • 1 big handful of fresh, chopped cilantro OR 1 tbsp dried cilantro

  • Salt and pepper to taste

Directions:

  1. Warm a skillet / wok over medium heat (choose one that has a lid).

  2. Add coconut oil and melt.

  3. Meanwhile, if using fresh cauliflower, wash cauliflower and chop into florets. Add to a food processor and “pulse” 10-15 times, until they are rice sized.

  4. Add the riced cauliflower into the skillet and toss to distribute the coconut oil. If using frozen, just dump them into the skillet from frozen, and then toss.

  5. Place a lid on the skillet and steam the cauliflower rice for 6-8 minutes.

  6. Remove the lid, but keep the skillet on the medium heat burner, and stir the cauliflower.

  7. Add in the lime juice, cilantro, salt, and pepper, and stir.

  8. Continue cooking with the lid off, stirring every few minutes, while you prepare the rest of dinner. The goal is to get the cauliflower to begin to brown a little.

  9. Once your cauliflower rice is cooked to your liking, layer it on top of greens, add some protein (like ground beef or green chili chicken), and top with an avocado, guacamole, pico de gallo, or ranch dressing.

NOTE: Feel free to add more or less lime juice, cilantro, and salt and pepper, to make it your own. I don’t usually measure any of it, and I taste as I go. You really can’t mess this up!